
![]()
Intro
I recently set up my blog on GitHub pages, but I didn’t want the *.github.io domain name. I have some of my domains in Google Domains, so I decided to set one of those up and write this tutorial for you after setting it up. Follow these steps and you too can have a custom domain.
Step 0: Build a GitHub Pages Site and Own a Domain with Google Domains
Before you can set up the connection between GitHub Pages and Google Domains you’ll need to have the site set up and the domain owned already.
Once you have those two things set up, come back here and you can set up your custom domain.
Step 1: Configure DNS in Google Domains
Go to the Google Domains Registrar, which should contain a list of domains you own there, and select the domain you want to configure.
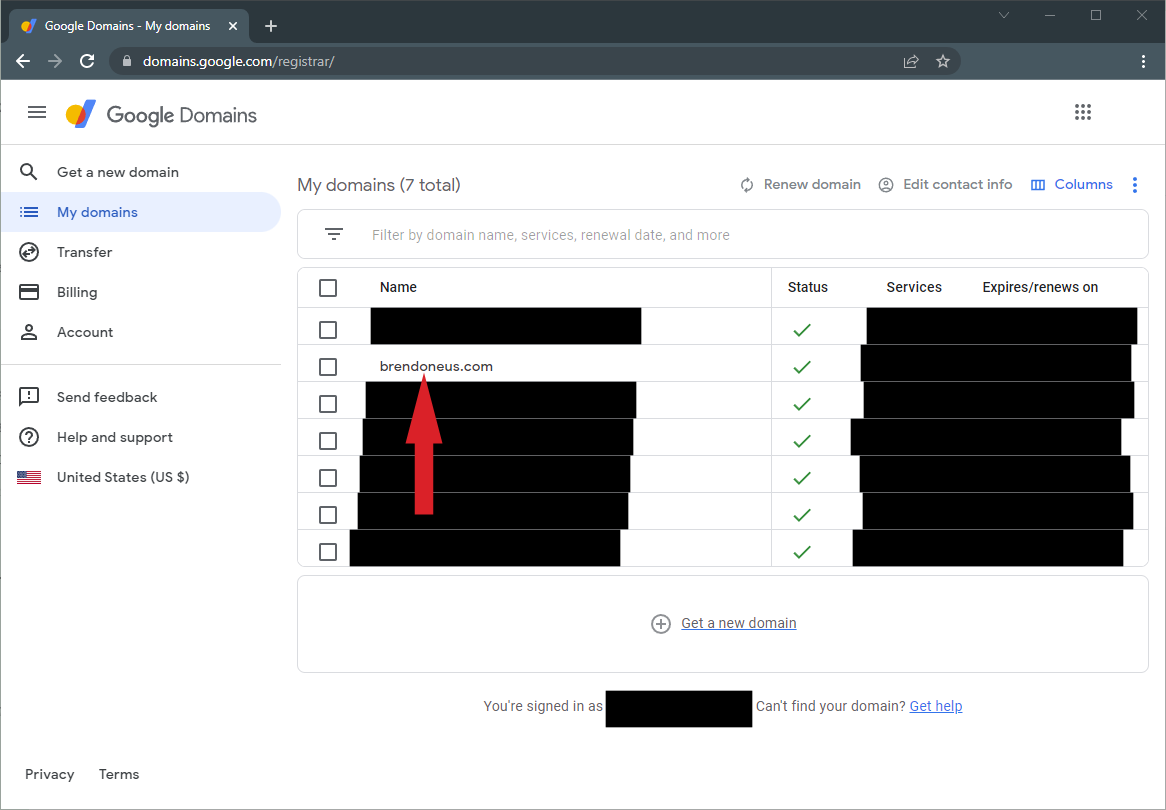
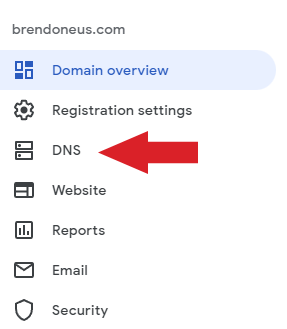
After clicking on the domain, you’ll need to go to DNS in the left navigation.
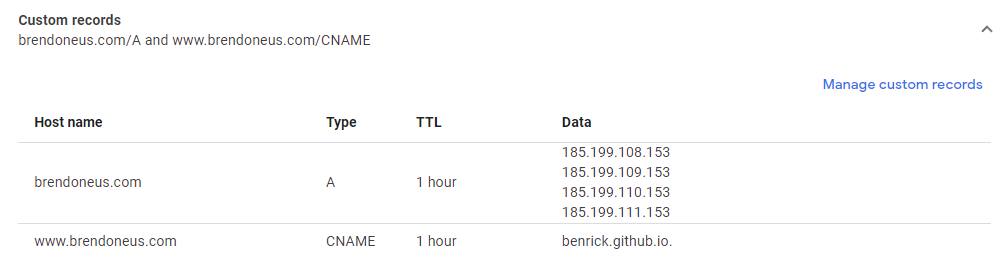
Set Up the DNS A Records
First, you’ll want to set up the A Records to point your domain at the IP Addresses for GitHub Pages, so it looks like these:
Click on Manage Custom Records to edit those on a screen like this:
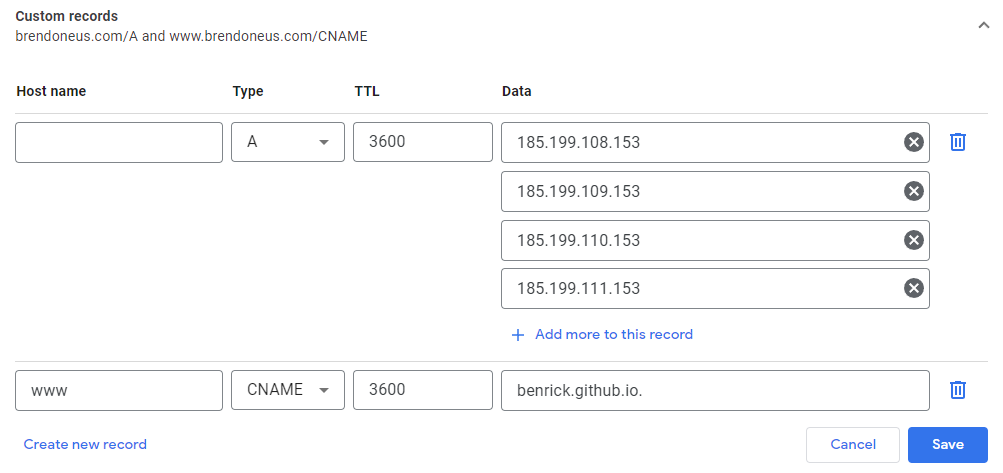
In that first record, leave the Host name blank, set the Type to “A”, and the Data to the first IP Address. Then you click the + Add more to this record until you’ve added all of these addresses.
- 185.199.108.153
- 185.199.109.153
- 185.199.110.153
- 185.199.111.153
You can check the GitHub Pages Custom Domain Docs for the most up-to-date list of IP Addresses.
Set Up the DNS CNAME Record
Next, while still on the Manage Custom Records screen, you’ll want to set up the CNAME Record to point to the custom subdomain you have at GitHub, mine is benrick.github.io. This will help if anyone tries going to the “www” version of your site.
Click on Create new record to add a new row to create the CNAME record like this:
Just be sure that you set the Host name to “www”, the Type to “CNAME” and the Data to your “*github.io” subdomain.
Step 2: Configure the Custom Domain in GitHub Pages
Now that our records are in place, we can tell GitHub to check for them. As with all DNS changes, it can take some time to propagate, so you may have to wait until GitHub can verify.
From your GitHub repository, click on the “Settings” tab.

From the Settings screen, you’ll click on the “GitHub Pages” link in the sidebar navigation.
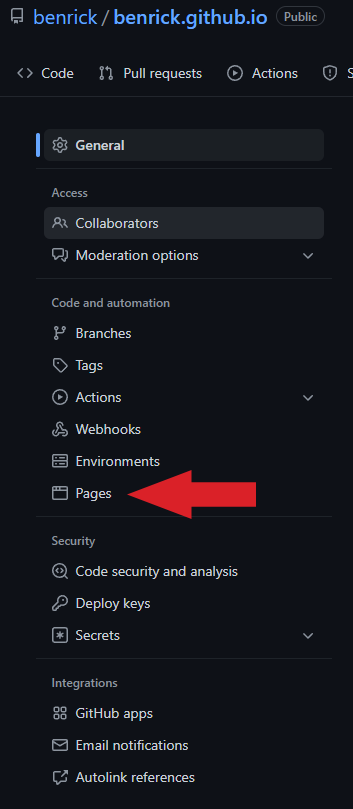
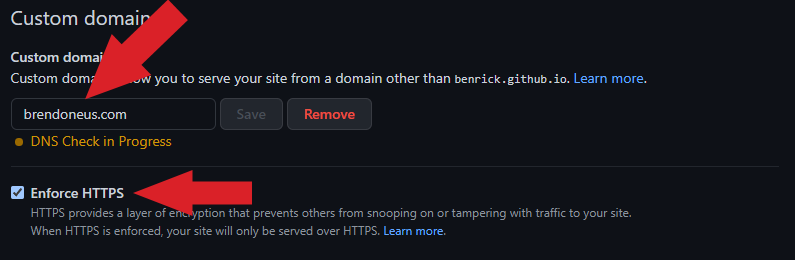
Now you’ll want to change the Custom domain to your domain name that we just configured and save that change, which causes GitHub to run a check of the DNS settings.
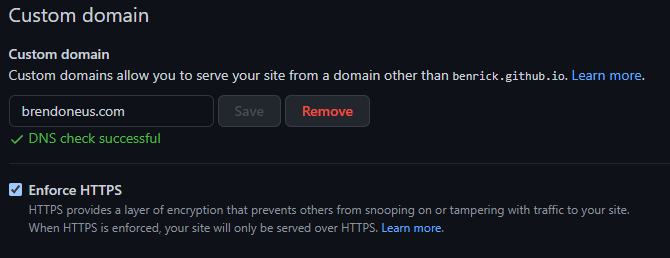
After verification, the page will look like this:
Step 3: Enjoy Your Site on its Custom Domain
Now you should be able to navigate to the site and see GitHub Pages site hosted using your custom domain name!
Comments