Hello and welcome! This post is part of the 2022 .NET Advent Calendar series of posts, but you can enjoy the content without worrying about that!
For this event, I thought I’d build a program that can show why you don’t want to have any logic in your controllers, pages, views, forms, etc. in your .NET application. I also figured we’d make it a fun little game.
Picking an Application Front-End
Now you might be wondering which choice I made for the UI of the application, since I mentioned a few types of front-ends and there are quite a few to choose from in each of those I mentioned above.
I could have chosen: WPF, UWP, WinForms, or even a Console application. This isn’t even considering the 3rd party options and variations on the first party ones!
As the title may have given the game away already, I’m not going to mention which UI we’re using yet. Why? I don’t need to! We can build the game and decide the UI later!
You’re likely also wondering which game I chose to make? I decided to make a Minesweeper-style game as I don’t even have a copy of it on my Windows PC anymore! A shame!
If you aren’t lucky enough to have played minesweeper when it was one of the few included games on Windows, I’ll explain the basic rules of the game.
When it loads, you have a grid of blank squares and an indicator of how many bombs are unmarked on the board.
When you left click a square, it will reveal that square (and possibly others).
If the square is a bomb, you lose.
If the square is adjacent to a bomb, it will display a number indicating how many of the 8 squares surrounding it contain bombs (1-8).
Otherwise, the square is blank, and the game will automatically reveal all contiguous blank spaces and the numbered spaces next to them.
When you right click a square, it will mark that space with a flag. This is mostly to remind you that you think a bomb is there. You can remove it by right clicking it again. These are also not required to use in order to win the game.
To win the game, you need only reveal the spaces that are not bombs, and the game will automatically mark the remaining spaces as bombs.
Initial Game Object
One of basic rules with dotnet is to create types when I want them and to get names that are “good enough for now”. Refactoring is the name of the game, because we have tools like Visual Studio, Rider, etc. that are quite good at handling renames.
Following that logic, I created a class to handle interactions with the game called… Game. I gave that game class a field containing a multidimensional array of integers positives are a bomb hint, 0 is no adjacent bombs, and negatives indicate a bomb is in the space.
Why did I start so simple? Easy, I may not have needed a Cell or a Grid class to implement a basic version of the game! I recommend people always stat simple like this, as it’s easy to add complexity when it’s needed, but harder to remove complexity.
My initial game looked a bit like this:
publicclassGame{privatereadonlyint_size;publicreadonlyint[,]Grid{get;}publicvoidStart(intsize){Grid=newint[size,size];FillWithBombs(0.1);SetHintValues(size);}privatevoidFillWithBombs(doublebombPercent){// Get bombs as a percent of all spacesintbombCount=(int)(Grid.Length*bombPercent);// Get an array of indexes as if the grid were one array.varpossibles=Enumerable.Range(0,Grid.Length).ToArray();// Pick a random selection of those indexes to receive bombs.varlocations=possibles.OrderBy(x=>_random.Next()).Take(bombCount);foreach(varindexinlocations){Grid[index%_size,index/_size]=_random.Next(-5,0);}}publicboolIsBomb(introwIndex,intcolIndex){returnGrid[rowIndex,colIndex]<0;}privatevoidSetHintValues(intsize){for(introwIndex=0;rowIndex<size;rowIndex++){for(intcolIndex=0;colIndex<size;colIndex++){if(IsBomb(rowIndex,colIndex)){SafeIncrement(rowIndex-1,colIndex);SafeIncrement(rowIndex+1,colIndex);SafeIncrement(rowIndex,colIndex-1);SafeIncrement(rowIndex,colIndex+1);SafeIncrement(rowIndex-1,colIndex-1);SafeIncrement(rowIndex+1,colIndex+1);SafeIncrement(rowIndex+1,colIndex-1);SafeIncrement(rowIndex-1,colIndex+1);}}}}privatevoidSafeIncrement(introwIndex,intcolIndex){if(rowIndex<0||colIndex<0||rowIndex>=_size||colIndex>=_size){return;}Grid[rowIndex,colIndex]++;}}
Notice that I’m able to create the grid with some basic values without too much trouble. I randomly placed some bombs and mark the hint values. Efficient? Fancy? Nope. Nope. But it works!
With this little bit of code, I was able to get a basic test that the board could get created. What was my initial UI? Console Application. Why? I could easily print out the contents of that array to see if the board looked like I expected. Yeah, the test confirmed that it created positive and negative numbers in a 2 dimensional array, but that’s not much gameplay tested yet. Next we’ll need to be able to hide and reveal spaces on the board.
Hiding and Revealing Spaces
Before we can play this game, we’ll need to hide the spaces, so we can reveal them when the player picks them later. Displaying everything was great for confirming that the application was creating the grid as we expected it.
Since we need to keep track of whether a space has been revealed or not, we either need two grids of data, one with the status and one for the value, or we could upgrade our grid to have an object that knows its value and the revealed state.
To start with, I created a Cell class and gave it properties for the Count of neighboring bombs and a Revealed boolean value to know when it should be displayed.
Now in order to make it an easier refactoring, I can add some implicit operator methods to the type, so our number operations on it will modify the Count property. That looks like this:
The code where I did this will work on the cells the same way it did when these were numbers:
privatevoidSafeIncrement(introwIndex,intcolIndex){if(rowIndex<0||colIndex<0||rowIndex>=_size||colIndex>=_size){return;}Grid[rowIndex,colIndex]++;// Works for int or Cell now!}
Handling Game Over
Minesweeper wouldn’t be much fun if we don’t lose by clicking a bomb, so let’s make sure that this causes an end game. To solve this, we have a few options. We could send a message then reset the game, or we could wait until the user starts a new game and change our “state” to be “Game Over”.
I like the idea of remaining in the “game over” state, so that the player can see the grid and their mistake that lost the game. That means we need to store that somewhere. We could use booleans for things like IsStarted, IsWon, IsLost, etc. to know the state. I think we’re only ever going to be in one state at a time, so an enum for this might be the simpler solution. Let’s create a GameState enum to handle this.
publicenumGameState{NotStarted,Started,Won,Lost}
Now we can adjust the reveal method to trigger a Lost state if we reveal a bomb while we’re in the Started state. We can also restrict the player selecting to reveal a space, so that it only happens if we’re in the Started state.
We can lose the game, but I think we’d all rather win. It’s time to add in the condition to allow a player to win! As we mentioned, that happens when the player has revealed every non-bomb space and not revealing any bomb spaces.
As we already created the Won value on the GameState enum, we can use it now to indicate that the player has won the game.
Thankfully, we already locked the revealing of spaces to require that it be in the Started state, which means that we won’t have to worry about accidentally clicking a bomb space after we’ve revealed all of the other spaces.
Now I’ll reveal the secret that I was able to run these tests before writing most of the code. My tests just needed to call methods on the Game object, because I could automate playing the game without a UI at all. I can do this, because I kept all of the logic out of the UI.
If I’d tied code into the UI, I’d have to spin up controllers, views or other context objects, which I’d rather not do in tests. I also haven’t tied myself to MVVM, MVC, MVP, etc. either. We can easily add those as wrappers, or directly put the concept on these classes.
Optional Homework
I built only the interface for the Console Application, but I left an empty WinForms and WPF application referencing the game library. The nice part is that you can build a front-end using any of the front-end technologies in the .NET space. I’ve put the Minesweeper in DotNet with C# code on GitHub with some empty projects that you could wire up a UI for and make buttons to reveal spaces and play the game.
Outro
One of my favorite things to do while programming in any language is to try to keep the application code away from the UI, because it gives us so much power of it when it’s just in a referenced class library.
Thanks for participating in this year’s .NET Advent Calendar! I hope you enjoy the next couple of weeks of these dotnet posts from members of the developer community.
If you don’t know me, my name is Brendan Enrick, and I’m a regular speaker at conferences and user groups. I host a live coding streams and create coding videos on my DevChatter Twitch and DevChatter YouTube channels. You can also follow me as @Brendoneus on Twitter or @Brendoneus@Our.DevChatter.com on Mastodon.
Lastly, and most importantly, I want to be sure to thank the organizers and other authors of the .NET Advent Calendar for making this an awesome bit of fun for everyone!
Hello and welcome! This post is part of the 2022 C# Advent Calendar series of posts, but you can enjoy the content without worrying about that! For the series, there will be 2 C# posts every day from 1st until the 24th of December from an awesome group of content creators!
Programming is hard. Most of us work in teams, building software that other people are going to work with. For that reason, it’s important that we try to make things easier for our team.
I think, however, it’s more fun that this post lightheartedly suggest making the code worse! And as this post is scheduled for the 11th of December, I figured I’d make a list of 11 ways of writing C# that will make our code harder for our team to work with, earning us a spot on the naughty list.
On the 11th day of C# Advent, I give to you, 11 things you should NOT do in your C# code.
The “for” loop exists in many languages. It’s a useful structure for creating consistent loops, and it’s no different in C#. I’m sure you’ve seen this a million times:
Doing that is OK, but what might upset some people is if you start getting too creative with your loops. Let’s jump back and explain the structure of the for loop, so we can discuss how someone might abuse it.
The 3 statements inside of the parentheses have conditions for when they run, but they’re just statements like any others you might have in your code. For this reason, you can put whatever you want in them.
OK, but what if we want to get really crazy. Let’s create multiple variables and use them in the loop! We can as long as we use tuple construction and deconstruction! Not Subtle Foreshadowing
As we just saw, you can construct and deconstruct tuples in the same line. Awesome! Now to upset the rest of our team, because we can put our entire constructor in one line now!
Now some people might do this in some select places, but if you start writing things this way often, it gets a lot harder for people to see what’s going on. These are also deconstructed in order, so it would be very easy for me to have these mixed up especially if parameters get changed or removed.
Did you notice? It is messed up. Look again!
Yep, nickname and suffix get flipped in this constructor! And there won’t be a compiler error for this one, since they’re the same type.
With all of the complex types we can get by using linq in C#, var was necessary. In fact, it’s an awesome addition to the language to not have to specify the type of variable, since the compiler knows the type already.
Let’s start by talking about why var is good and useful in C# coding. Hint: it’s not useful for just avoiding writing types in C# code. It’s useful when the type is more complicated than is needed. Exhibit A, the GroupBy.
// Clear, but lengthy.IEnumerable<IGrouping<DateOnly,Person>>peopleGroupedByBirthdate=people.GroupBy(person=>person.Birthdate,person=>person);// Less clear, but concise.varpeopleGroupedByBirthdate=people.GroupBy(person=>person.Birthdate,person=>person);
It’s for complicated types like these (and anonymous types) that var became necessary. In fact, nearly everywhere that a GroupBy result is stored in a variable, you’re likely to see var in the code. Sometimes that’s because the result needs to get turned into a new anonymous type.
Now, dear reader, you’re likely wondering why we wouldn’t just use this everywhere. We can just write var for nearly every variable we create!
That’s because knowing the type of a variable can be useful to us as programmers. When you use var, you’ve hidden the information. We no longer know the type. If the type was somewhere else on the line, that’s probably ok, but if it’s not there, it better be super clear what the type is.
Notice that we can’t tell the type of any of these variables without putting a cursor on the type. At-a-glance, you might guess that GetAuthorName and GetAuthorFullName return the same type, but it’s not clear that they do. Let’s see this example without var.
This is useful for immediately knowing what type of sequence you have, enumerable, list, array, etc. or what other type you have. With the native number types, it would catch your eye immediately if you noticed a double used for a financial transaction or for something consistently rounded like an age of a person. If the information isn’t at-a-glance, you won’t consider it.
And if you’re wondering, I have been fighting against this overreliance on var in C# for a long time as this 13.5 year old post illustrates.
In the C# world, we work with “disposable” types all the time. When we say that, we usually mean that the type implements the IDisposable interface. There’s even a language feature called using statements that was built for these. When you create your variable in one, it is supposed to dispose when you reach the ending curly brace.
If you want to upset your team, stop using the using statements. Ignore what’s special about disposable types. What could go wrong?
Well, a lot can go wrong. When a type implements IDisposable, it’s so that it can be cleaned up correctly. These are for types that have resources that need to be cleaned up before the type is disposed of. Often these are network connections, file system connections, etc. that we don’t want to leave open. If we don’t dispose of them correctly, these get left open.
// Normal way - GOODusing(SqlConnectionconnection=new(connectionString)){SqlCommandcommand=new(query,connection);connection.Open();using(SqlDataReaderreader=command.ExecuteReader()){while(reader.Read()){// Use reader here.}}}// Skipping those Disposables - BADSqlConnectionconnection=new(connectionString)SqlCommandcommand=new(query,connection);connection.Open();SqlDataReaderreader=command.ExecuteReader()while(reader.Read()){// Use reader here.}// GAHHH!!
And if you’re thinking that it’s nice to not be so nested, please don’t use that as an excuse. The language no longer requires {} and nesting with a using statement. It will dispose at the end of the current context.
One thing you can do as a programmer to get my attention on a code review is to handle an expected or likely situation by throwing an exception instead of just escaping and returning a value.
Did a user forget to enter a value? That’s a validation error that we can return, not an exceptional case! We can (and should) return an error result from our method and inform the user of the issue. If the value were missing during some internal calculatoin, that’s a data integrity issue after validation, an exceptional case that might require stopping the code to prevent further issues.
So how could we upset our team? Well, in theory, you don’t have to return values from your methods at all! You could throw exceptions for everything!
privatevoidUpdateProfileData(ProfileDatadata){if(data==null){thrownewArgumentNullException(nameof(data));}if(string.IsNullOrWhiteSpace(data.FullName)){thrownewArgumentException("Missing Name",nameof(data));}// Save changes herethrownewProfileDataUpdatedSuccessfully(data);// (╯°□°)╯︵ ┻━┻}
Never thought of that, did you?! Well now you can write some truly terrible code. These act kind of like events that require that you handle them or your application crashed.
Not much to say here. Some compiler warnings may not be issues, but often they’re indicative of a place where an error is likely to go unnoticed. Some of us like the property to treat warnings as errors in dotnet, because it forces us to fix every warning. This keeps the signal to noise ratio low, increasing the chance that we’ll catch bugs earlier.
Adding a warning or two to a code library can be necessary sometimes, so they have a NoWarn property that you can set in the project, allowing you to specify the warnings to ignore.
If you really want to upset your team, just add another warning to ignore with every commit that created a warning. Then your code will be warning free!
<NoWarn>12345,23456,34567,45678,56789</NoWarn>
On a more serious note, I’ve worked with many clients (development teams) whose code bases had hundreds of warnings that just sat there. It would’ve been difficult to know where to start with fixing them.
If this is your situation, I highly recommend setting up a metric to watch that number and use the scout rule in programming to clean up a warning or two each time you’re in a file.
When naming a variable, it’s far more important for a reader to know what the variable’s purpose is. If you’re trying to make your codebase difficult, you might embrace this ambiguity, which can arise from abbreviations.
Even if an abbreviation is common in your codebase or domain, you could have a collision or just confusion you haven’t thought of yet.Clarity can prevent headaches from forming among the development team!
When you have a bunch of this internal, required domain knowledge, it makes your codebase much harder for new people to join, since they’ll have to learn a list of abbreviations just to get started.
varsimpleTransfer=newSimpleTransfer();varserviceTime=newServiceTime();varsecretTunnel=newSecretTunnel();// Through the mountain!
Note: For this example, assume these were in different scopes, so the compiler would allow it, but seeing st in the code wouldn’t tell you which stthis was!
These are some abbreviations I’ve come across in code bases that aren’t what you might first think they are:
"E2E" and it wasn't End-to-End like I thought.
"IRS" and it wasn't related to taxes.
"IBM" and it wasn't the computer company.
"S3" and it wasn't the AWS storage.
"NES" and it wasn't the video game console.
"DDL" and it wasn't a DataDefinitionLanguage or a DropDownList.
"DLL" and it wasn't a DynamicLinkLibrary.
You’ll often find that classic “i” as the variable in a basic for loop. If you’re not using the i itself, but it’s just the number of times you looped, this can be OK.
Also, for a lambda selector where the collection name makes the x obvious, it can be OK. Once you start chaining, LINQ extensions, you’re no longer OK.
// This is an OK alternativeintmaxTemperature=dailyForecasts.Max(x=>x.Temperature);// to thisintmaxTemperature=dailyForecasts.Max(forecast=>forecast.Temperature);
Pretty much, if you’re doing anything other than what’s listed above, you’ve found your way onto the team’s naughty list. When you start chaining LINQ extensions in your code, the data will often change from the initial type that started the chain. Unlike a fluent API, where the return value is often the same type that all the methods extend, these will return new and different objects. As a result, the types of those object matter!
Here’s a not-too-complex example that shows that even in the simpler cases, it could be nicer to have variable names.
Want a quick and easy way to make your code harder to read? Nest your conditionals needlessly deep by adding separate checks instead of using && or a quick null conditional or null coalescing operation.
As people learn about Dependency Inversion and mocking, some take this to the extreme, adding an interface to every class regardless of whether there will be multiple implementations or a need to be mocked.
For clarity, I’m not saying you can’t have interfaces for models. You might have interfaces for all cached objects, all printable objects, etc. in your codebase. These are likely to have multiple implementations, and there’s polymorphic reasons to have these.
The problem is when you get IStudent for Student, ITeacher for Teacher, and ILesson for Lesson. None of those objects likely need a mock for testing, since you could just create instances of those models for testing.
Some useful interfaces might be things like, ISchoolMember for Student, Teacher, and Administrator, which requires a SchoolID property on these objects.
Yes, we saved the worst for last. I won’t shame anyone for using a region in their code, however, nearly all uses of them are better replaced by a change t the code.
Plenty of people do use regions, and like being able to define sections of code in those named blocks. A region inside of a method, however, better have a really good reason to exist. By labeling that section of code with a region, you’re begging for a method to be extracted for that code.
publicProcessResultProcessStatusUpdate(ChangeLogchanges){#regionValidateChangesif(changes==null){throwInvalidChangeLogException(changes);}if(changes.Actions<=MinimumActions){throwInvalidChangeLogException(changes);}#endregion#regionPrintChangesConsole.WriteLine(changes.Title);Console.WriteLine(changes.SubTitle);foreach(varchangeActioninchanges.Actions){Console.WriteLine(changeAction.Message);}#endregion// More code here}
Instead of the regions, we could’ve just created methods for those named parts of the code.
publicProcessResultProcessStatusUpdate(ChangeLogchanges){ValidateChanges(changes);PrintChanges(changes);// More code here}publicvoidValidateChanges(ChangeLogchanges){if(changes==null){throwInvalidChangeLogException(changes);}if(changes.Actions<=MinimumActions){throwInvalidChangeLogException(changes);}}publicvoidPrintChanges(ChangeLogchanges){Console.WriteLine(changes.Title);Console.WriteLine(changes.SubTitle);foreach(varchangeActioninchanges.Actions){Console.WriteLine(changeAction.Message);}}
Thanks for participating in this year’s C# Advent! I hope you enjoy the next couple of weeks of these C# posts from members of the developer community.
If you don’t know me, my name is Brendan Enrick, and I’m a regular speaker at conferences and user groups. I host a live coding streams and create coding videos on my DevChatter Twitch and DevChatter YouTube channels. You can also follow me as @Brendoneus on Twitter or @Brendoneus@Our.DevChatter.com on Mastodon.
Lastly, and most importantly, I want to thank Matt Groves @mgroves for organizing the C# Advent, which has been an awesome way to flood our feeds with great C# content! I’m grateful to have been able to help out and add to the C# fun this year!
Did you know that you can customize the file icons in VS Code explorer, customize and search the keyboard shortcuts in VS Code, view a printable keyboard shortcut cheat sheet, and import the keymaps from other editors into VS Code?
I've been creating a series of videos on YouTube about cool things in VS Code that you may not know about. Check out the [DevChatter YouTube Channel](https://www.youtube.com/c/devchatter) if you want to see all of my videos, or you can see the [VS Code Tips](https://youtube.com/playlist?list=PLfRLz7YT8uz36VdgSMATJj2chNtbixokI) Playlist.
Changing the File Icons in VS Code
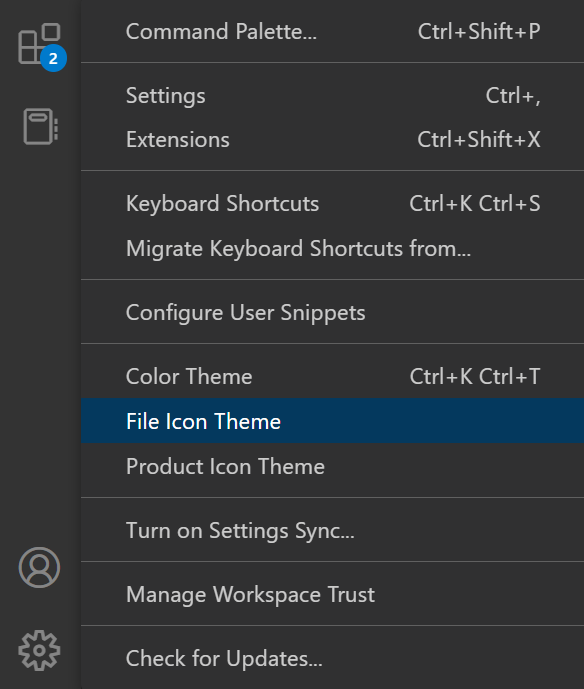
You can change the theme of the file icons in VS Code Explorer Sidebar by opening up the File Icon Theme menu. You can open it from the manage menu (the gear in the sidebar) by selecting File Icon Theme or by opening the commands menu [F1] or [Ctrl] + [Shift] + [P] and searching for “File Icon Theme”.
Opening File Icon Menu from Manage Menu
Opening File Icon Menu from Command Menu
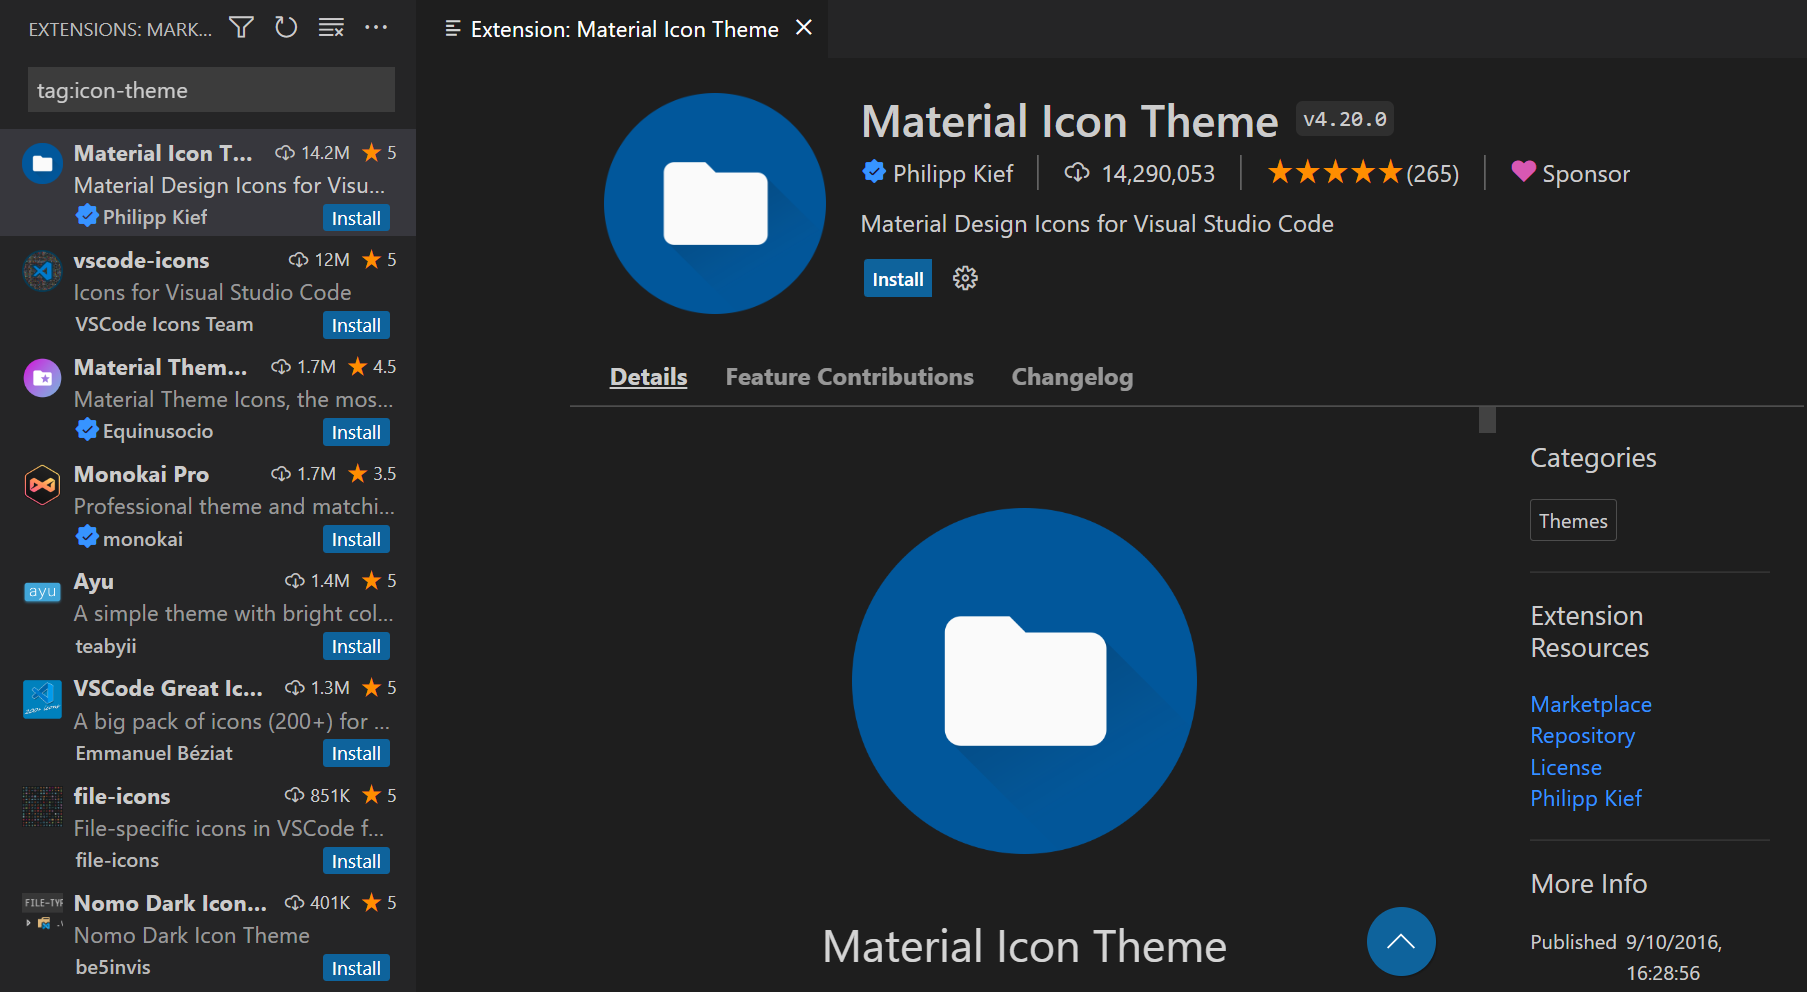
Once open, you can preview the file icon themes by using the up and down arrows to select each of the installed icon themes. You can click on the theme you like to change to it. If you select the last item, Install Additional File Icon Themes..., it will open the Extensions sidebar showing results for extensions to change the file icon theme.
You can open and see details of each extension to choose which (if any) you want to install. Just install them by clicking the Install button (like a normal extension). Once installed, you can open up the File Icon Menu again to preview or change your newly installed file icon themes.
Keyboard Shortcuts in VS Code
There are more keyboard shortcuts in VS Code than most of us can remember. Luckily, we don’t have to remember them all, since VS Code has a Keyboard Shortcuts window that allows searching for shortcuts.
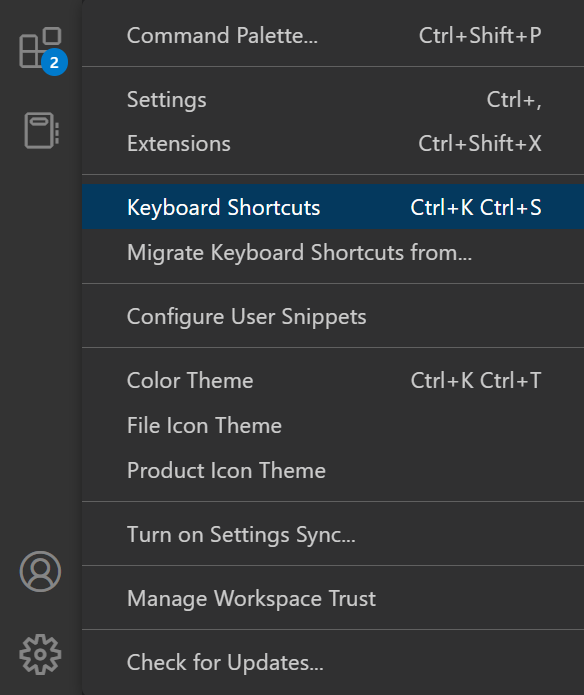
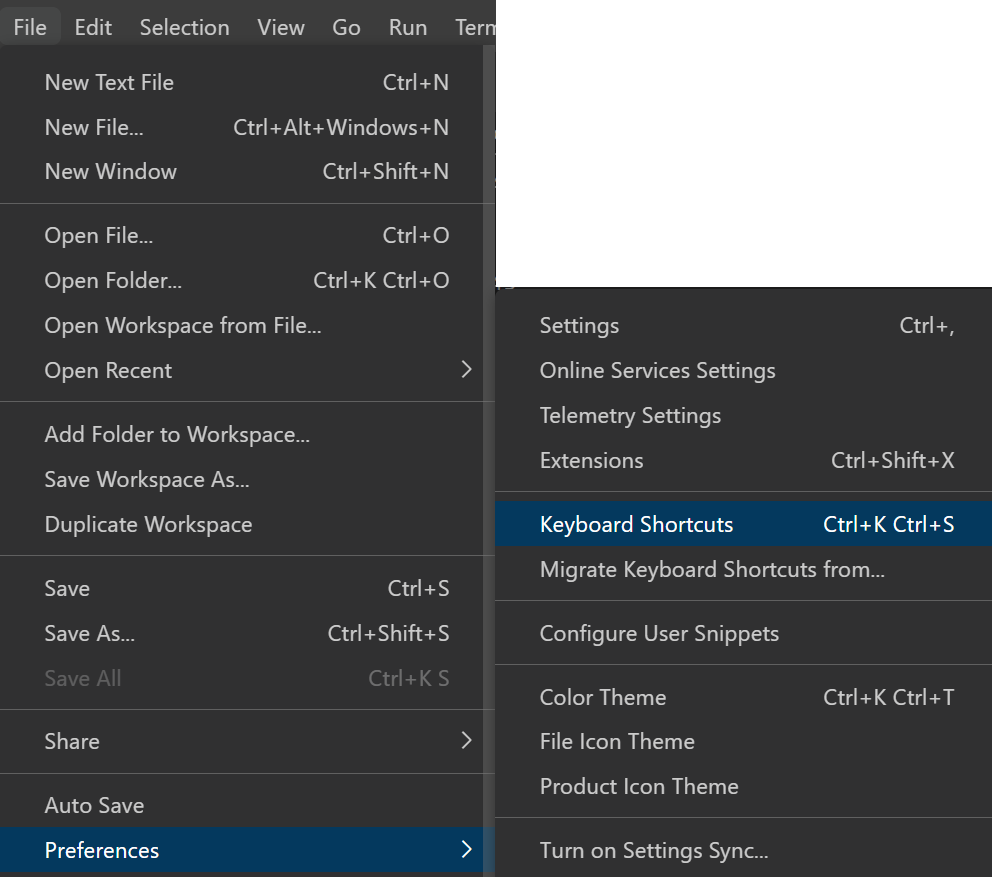
You can open the Keyboard Shortcuts window from the manage menu (the gear in the sidebar), from File -> Preferences -> Keyboard Shortcuts, by opening the commands menu [F1] or [Ctrl] + [Shift] + [P] and searching for “Open Keyboard Shortcuts”, or by using the keyboard shortcut [Ctrl] + [K] + [S].
Opening Keyboard Shortcuts from Manage Menu
Opening Keyboard Shortcuts from Command Menu
Opening Keyboard Shortcuts from File Menu
Once you’ve opened the keyboard shortcuts window, you can use the search box to search for any possible actions that can have a keyboard shortcut set for it. With any of the items in the list, you can also change any of the shortcuts if you want to.
If you want a printable set of the default keyboard shortcuts, you can find a link to it inside of VS Code (for your operating system) by opening the commands menu [F1] or [Ctrl] + [Shift] + [P] and searching for “Keyboard Shortcuts Reference” or by using the keyboard shortcut [Ctrl] + [K] + [R] (remember it as Keyboard Reference).
VS Code isn’t the first editor I’ve ever used. In fact, I’ve used and know the keyboard shortcuts to Visual Studio, Rider, WebStorm, Notepad++, etc. When I’m switching between them, it’s definitely a challenge to switch my brain to thinking of the correct set of shortcuts. If I wanted to make it easier, I could import the full keymap of another IDE into VS Code.
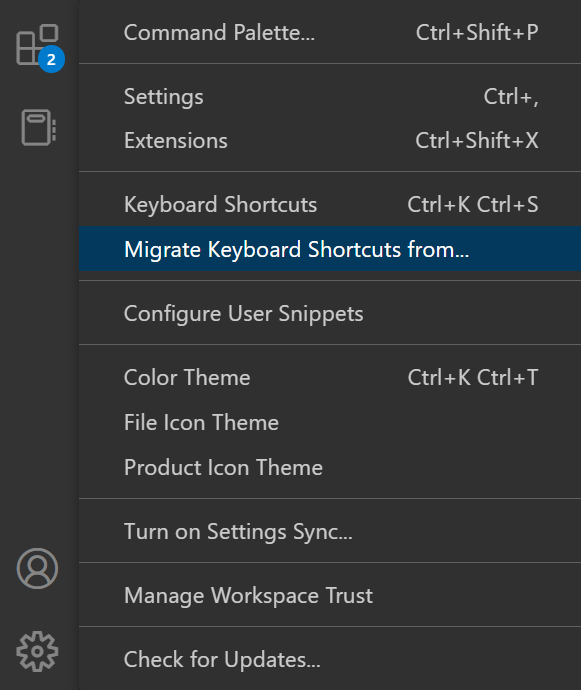
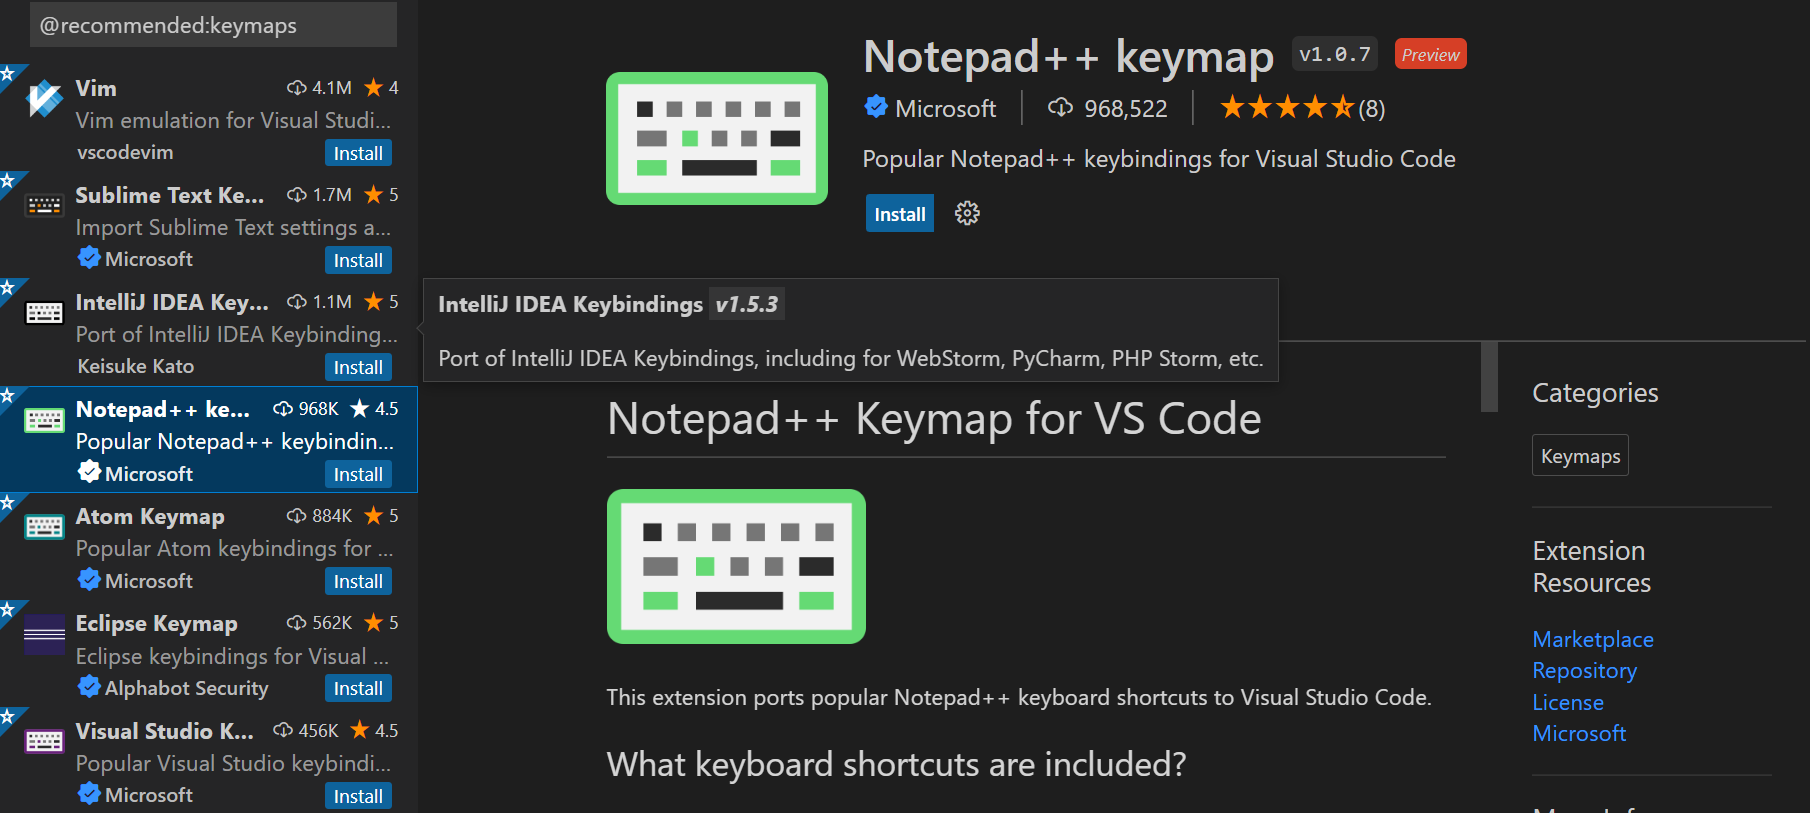
To migrate your keyboard shortcuts from another editor, open the manage menu (the gear in the sidebar) and choose Migrate Keyboard Shortcuts from..., which will open up the Extensions sidebar showing the results of a search for keymaps.
Many of these will do more than just a keymap import, so read the extension details for how to use the one for your editor.
I am very excited and honored to announce that 2 of my workshops have been accepted at CodeMash 2023! This will be my 10th year speaking at CodeMash (including times as a secondary speaker). I’m looking forward to making it back to this event, which I’ve not attended for years due to the global pandemic.
If you’ll be attending the event, be sure to say “hello” to me in the hallways of the event or before/after one of my pre-compiler workshops.
Session Details
If you’re wondering about my workshops for the event, I’ll be doing 2 workshops to help people build up their TDD skills, and I’ll have an awesome co-speaker helping me make these workshops awesome!
Establishing Good TDD Habits - Workshop at CodeMash 2023
Learn fundamental techniques to improve your code through TDD and Pair Programming. You’ll sharpen your skills working with your peers on programming exercises designed to instill good techniques that you’ll be ready to apply on your current and future projects.
Mastering TDD in Legacy Code - Workshop at CodeMash 2023
Learn to effectively use the principles and practices of increasing the reliability and maintainability of your code through testing and pair programming. Sharpen your skills working with your peers on programming exercises designed to instill good practices that you’ll be ready to apply to non-trivial code-bases.
Did you know that you can change your themes in VS Code, use a keyboard shortcut to open the VS Code settings, make changes by searching the settings window, and synchronize your settings across multiple instances of VS Code?
I've been creating a series of videos on YouTube about cool things in VS Code that you may not know about. Check out the [DevChatter YouTube Channel](https://www.youtube.com/c/devchatter) if you want to see all of my videos, or you can see the [VS Code Tips](https://youtube.com/playlist?list=PLfRLz7YT8uz36VdgSMATJj2chNtbixokI) Playlist.
Changing the Theme in VS Code
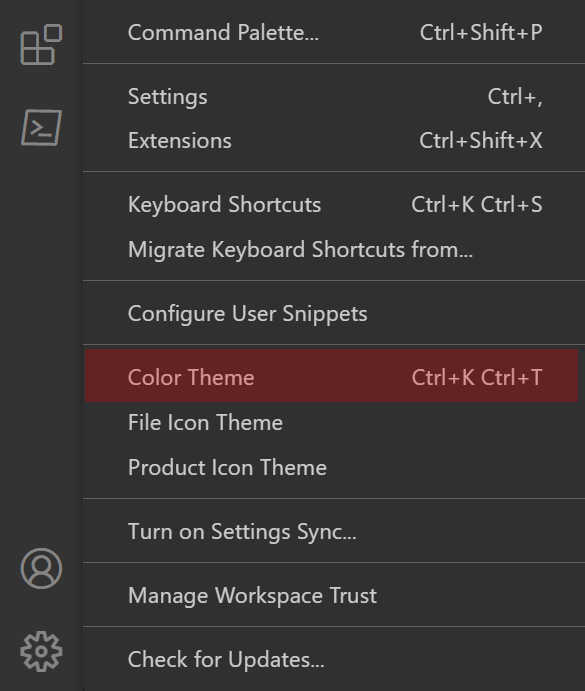
You can change the theme in VS Code by opening up the Color Theme menu. You can open it in one of 3 ways: opening it from the manage menu (the gear in the sidebar), opening it with the keyboard shortcut [Ctrl] + [K] + [T], or opening the commands menu [F1] or [Ctrl] + [Shift] + [P] and searching for “Color Theme”.
Opening Theme Menu from Manage Menu
Opening Theme Menu from Command Menu
Searching the Settings in VS Code
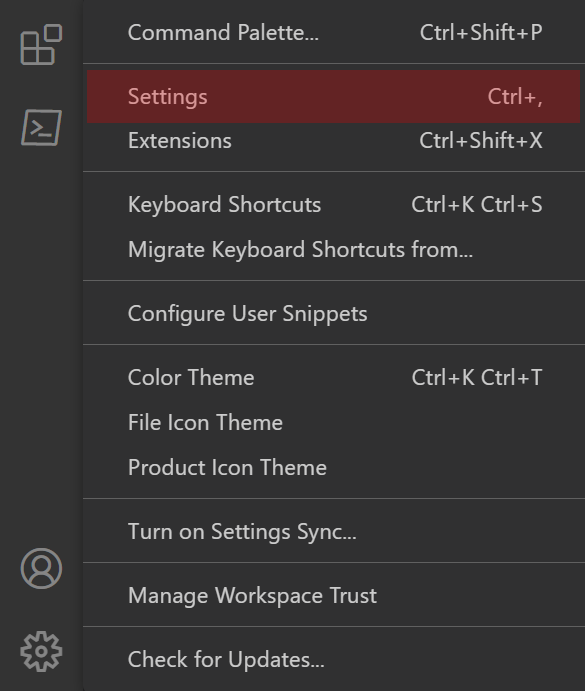
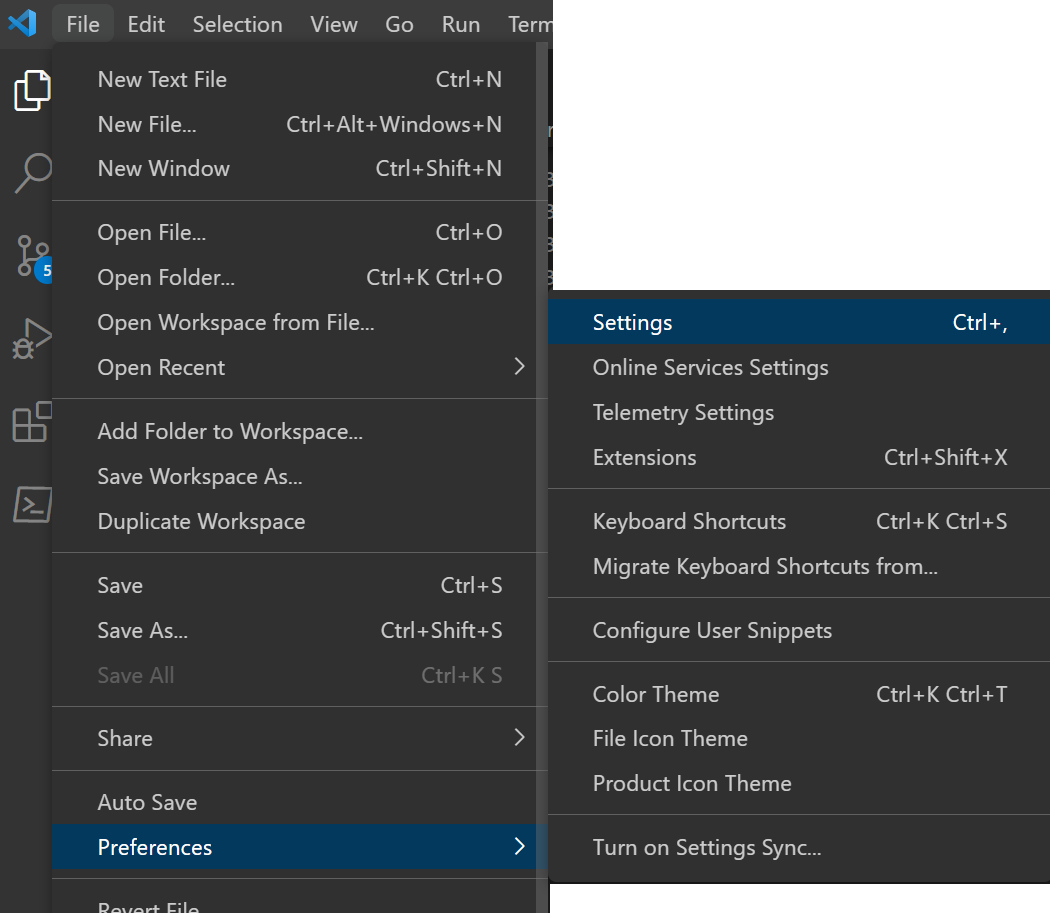
There are many settings built into VS Code, and many others included as part of extensions. For this reason, it can be hard to keep track of and know all of the different settings, which is why VS Code allows you to search for settings. You can open the Settings window from the manage menu (the gear in the sidebar), from File -> Preferences -> Settings, or by using the keyboard shortcut [Ctrl] + [,].
Opening Settings from Manage Menu
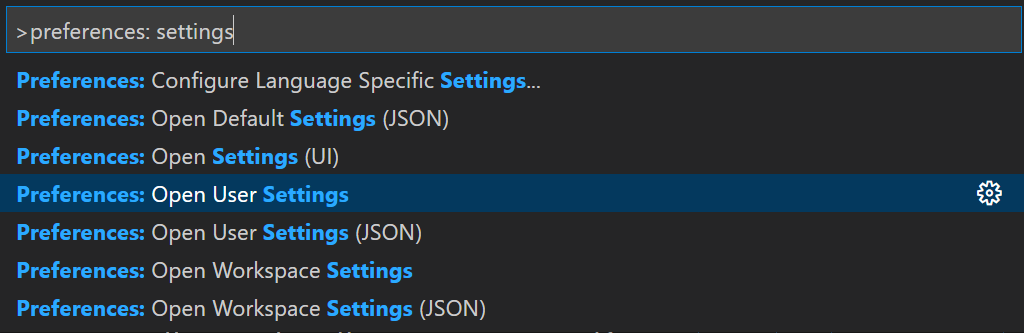
Opening Settings from Command Menu
Opening Settings from File Menu
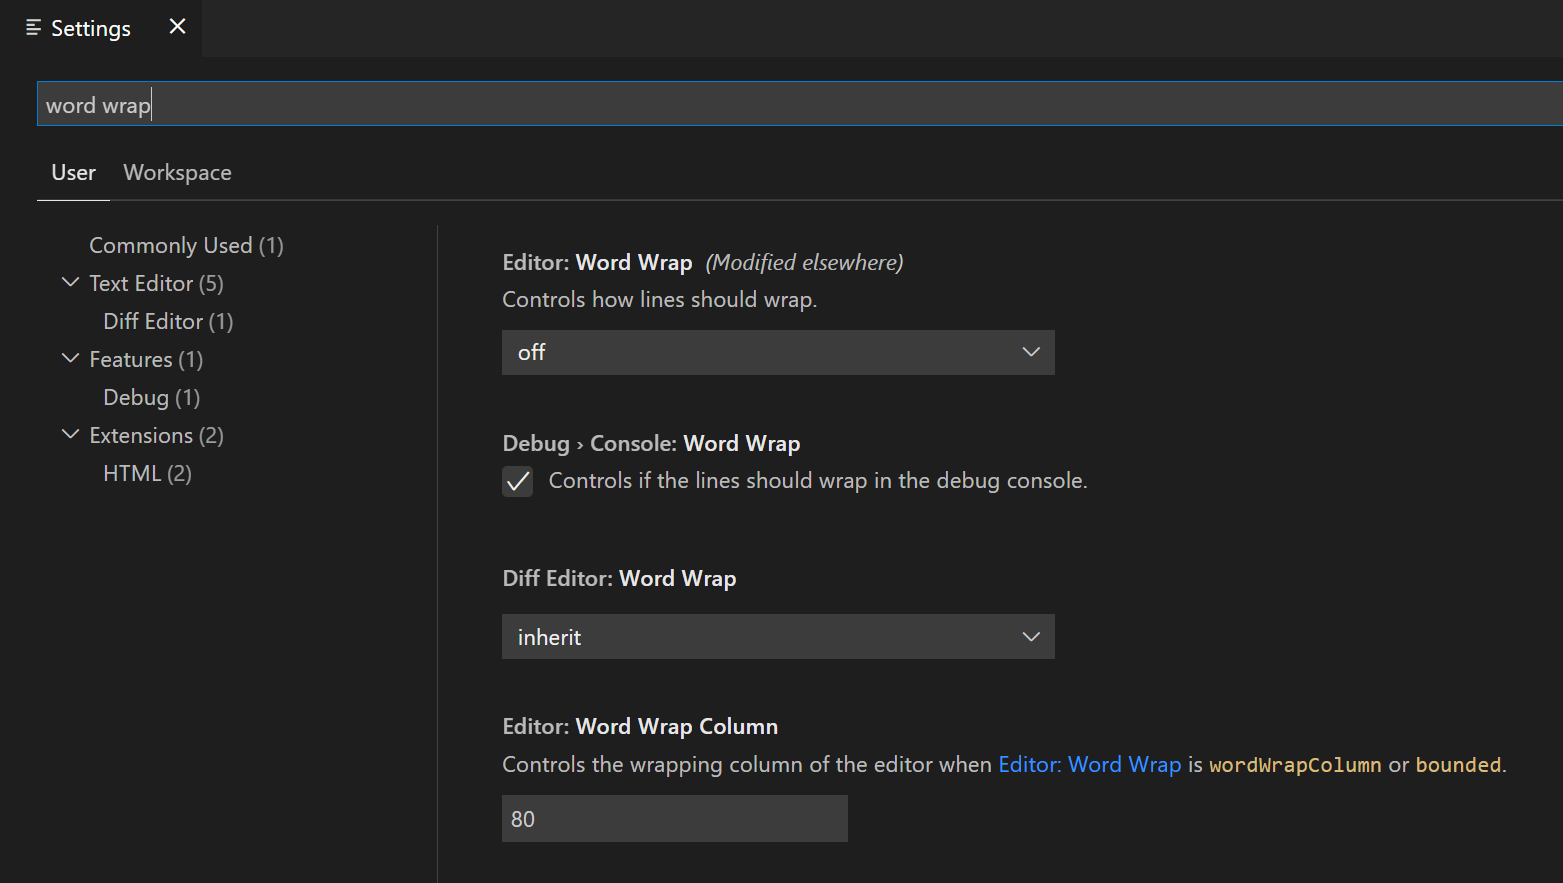
Once you’ve opened the settings screen, you can use the search box to search for a term and it will filter the results to those settings matching your search term. In addition, notice that the left navigation of settings also filters down to the settings matching your search.
Syncing the Settings in VS Code
I’m writing this post on my laptop using VS Code. On a daily basis, I work on multiple laptop computers and desktop computers. Each of these machines has VS Code installed on it. If I make changes to the settings in one, it would be nice if that replicated to the others. In years past, many of us found ways of automating this process in our various editors using cloud file storage to transfer settings file changes (and similar solutions).
No longer must we implement our own syncing, since VS Code has a built-in settings synchronization system. As long as you have a GitHub or Microsoft account to log into, you can have VS Code sync your settings.
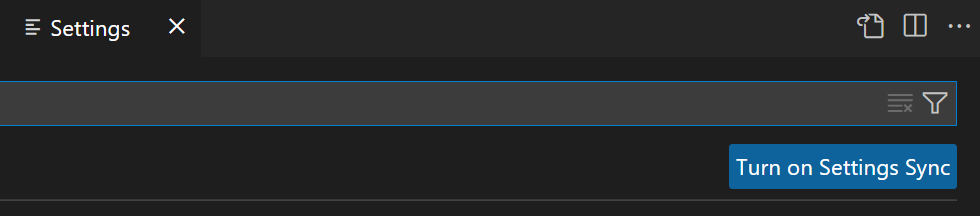
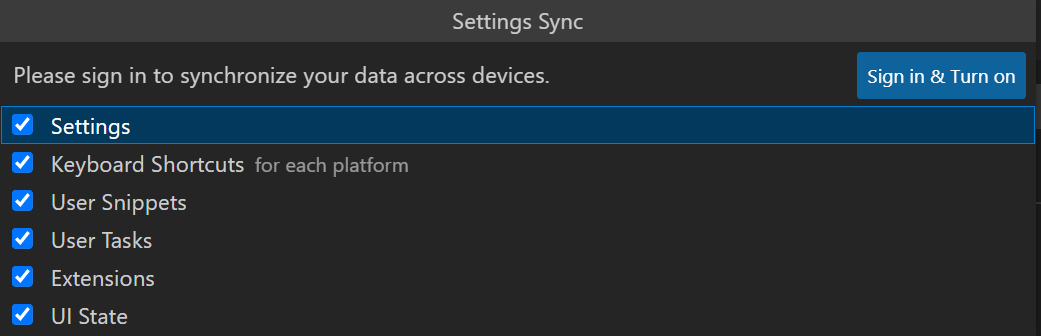
Open up your settings menu as we did above and click on the Turn on Settings Sync button in the upper right side of the Settings window.
Once open, you’ll need to choose which settings you want to sync and then click the button to log into your account to sync the settings.
After clicking log in, you’ll need to choose which type of account to log into.
This should now open a browser that takes you to the appropriate authentication screen and allows you to login. After logging in through the browser, it should share that permission with VS Code and syncing should now be happening.