I recently moved my blog (this one) from BlogEngine.NET to a Jekyll site on GitHub Pages. I tried to keep all of my posts working with the same URLs for the content. I didn’t worry about the tags, categories, etc. pages remaining the same. I figured that no one linked to those anyway, so the redirects would only be important on the posts.
Hopefully this post will help you migrate an old site from any platform (not just BlogEngine.NET) to Jekyll on GitHub Pages.
Exporting Existing Blog Content
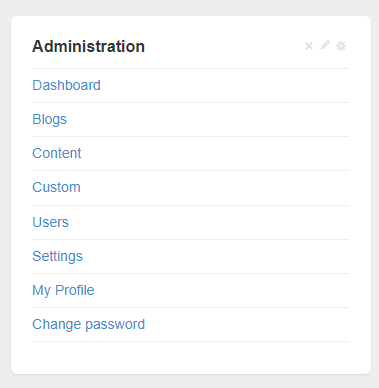
Before we can create all of the posts on the new site, we’ll need to export the posts from our existing site. For this, most sites have an export function. In BlogEngine.NET, you’ll want to got to the Admin Dashboard by navigating to /admin/ or clicking on Dashboard in the Admin widget.
From here, we need to open up Settings -> Import export then click on the Export button in the Export section of that page.
When we click this button, the site will create a BlogML.xml and your browser will download it. That’s an XML containing your posts, comments, metadata, etc. from your site.
I exported my comments, since I didn't care about preserving them. I did some googling and found that some people created tools to assist in moving this data to Disqus, but I haven't bothered with that yet.
Setting Up Jekyll Site on GitHub Pages
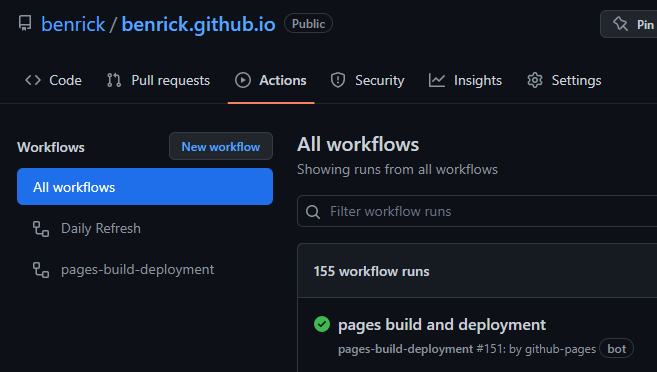
Now I needed a new GitHub repository to host the content for my site, so I created benrick.github.io to host my site.
Types of GitHub Pages sites
For GitHub Pages, you can set up User, Organization, or Project sites to be hosted by GitHub Pages.
I did a user site with repository name benrick.github.io, which followed the required repository name pattern of [username].github.io (will be the same as the address).
If I’d done a site for my DevChatter organization, it would’ve been devchatter.github.io, following the [organization].github.io pattern.
If I did a project site, it could’ve had any name, but would be hosted at [username].github.io/[project-name] or [organization].github.io/[project-name]. So if you’re going to do this, be warned of the subfolder, which can be avoided with a custom domain (discussed below).
Configuring the Repository as a GitHub Pages Site
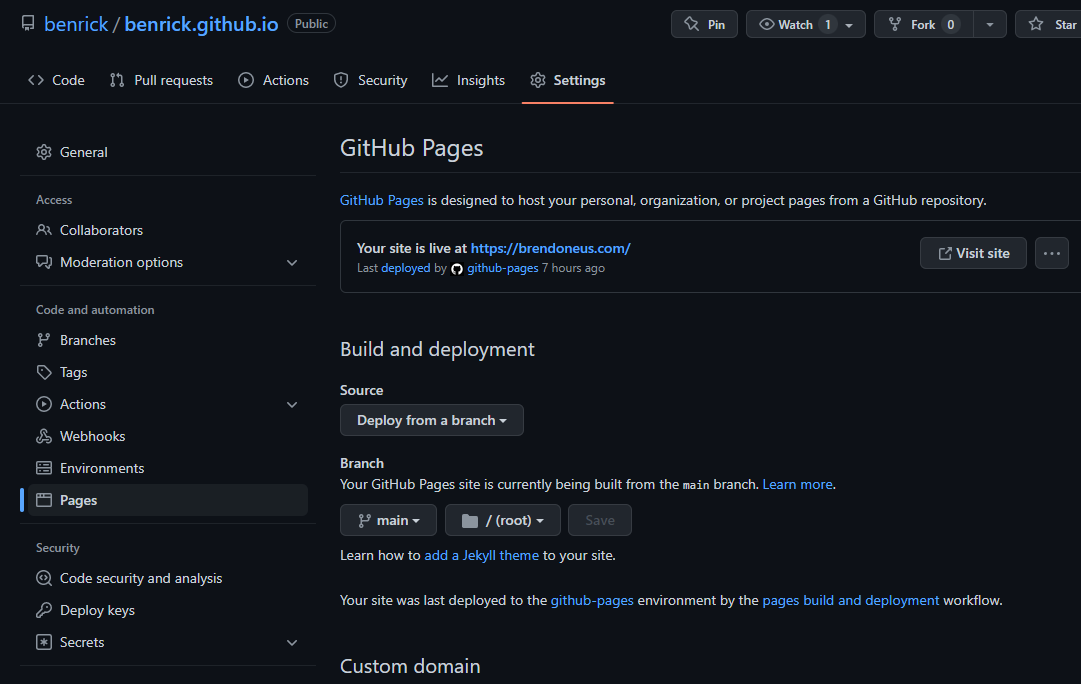
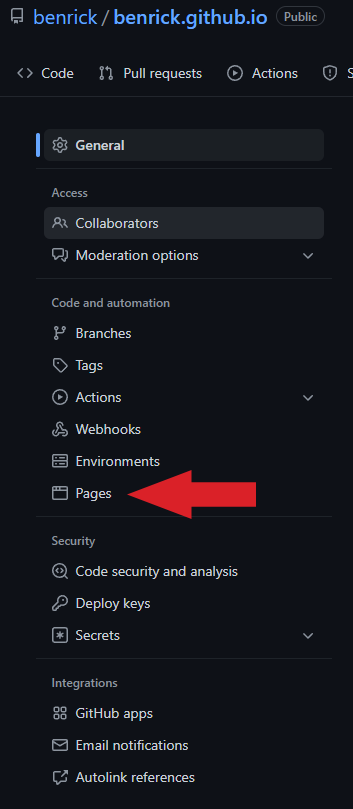
Navigate to the Settings of the repository and click on the Pages menu item in the Code and automation section of the sidebar navigation.
Source should be set to Deploy from a branch for our simple case.
I set Branch to main and I keep the site in the root, so folder of /(root).
Don’t fiddle with the Custom domain yet, we’ll come back to that later.
Now that it’s configured, make sure that everything is working. Create an index.md file in the root of your GitHub repository with anything you like. Here’s an example:
<p>Hello World!</p>
Next, we’ll make our _config.yml file in the root of your GitHub repository with these initial values:
If you created these files directly on GitHub, you can just wait, but if you created these locally, push them to GitHub. Now you’ll want to wait a few minutes for it to deploy, and try to visit your site at the *.github.io address that you chose earlier. If all is set up, you’ll see your
Selecting a theme can offer a lot of benefits. Setting it up to work locally will require setting up ruby, installing the gems for the theme and its dependencies, etc.
If you’re just planning to deploy without running it locally, you can skip those for now (you can add local running later).
Here are a few places to find free themes (there are many more):
https://pages.github.com/themes/
https://jekyllthemes.io/free
https://jekyll-themes.com/free/
And if you want to (and have the money to) support content creators, there are many paid Jekyll themes as well.
Once you’ve chosen a theme, you’ll either be setting the theme: or remote_theme: in the _config.yml file in the root of your site. Most of the themes you find will have their own instructions, which are often for running it locally. Setting these properties will let it work with the GitHub Pages workflow.
Converting Blog Posts to Jekyll Markdown Posts
After exporting your content from your previous blog, check to see if there’s a tool created to convert that export into markdown files. Once completed, you’ll put all of those markdown files (if the tool didn’t do it) into the _posts directory in your repository.
For my conversion from BlogML.xml (the data exported by BlogEngine.NET), I started with this blogml.rb file and made a few tweaks to it. You can start with that one, but it’s written for Octopress, a framework based on jekyll. It’s close enough to Jekyll to get you started. Alternately, you can use my tweaked version of the BlogML.xml to Jekyll import script.
Regardless of the one you’re using, with ruby installed on your computer and the BlogML.xml file and the blogml.rb file in the same folder, run the following command in that folder.
After running this, you should have a _posts folder full of your posts.
Content Fixes
Be sure to check through your pages, articles, etc. since you’ll want to be sure they transferred correctly. There could be issues in the “frontmatter” (metadata at the top of the file), so be sure to check titles, permalinks, and tags.
Some of these issues can be fixed by hand, but anything that happened in a large number of files will require some clever finding and replacing.
Migrating Files and Images from BlogEngine.NET to Jekyll
In the root of your new site, create two folders named files and images. These are where your files and images will go.
Download the /App_Data/files folder from your old BlogEngine.NET site. Use whatever means you have of accessing your old site’s file system. I used FTP access to it.
You now need to split the files and images into their respective folders, maintaining the original structure.
To make this easier, I recommend that you put a copy of the files into each of the two folders. Then delete the images from the /files folder and the files from the /images folder.
Deploying and Verifying
Commit your changes and push them all to the GitHub repository. As we’re using GitHub Pages default deployment, you should be able to navigate to the Actions section on the repository before it completes the deployment to see that it is building and deploying the static site.
You should see deployments from our previous changes to the repository.
After confirming that it has a deployment (it should be green), you’ll want to navigate to your *.github.io site as we did earlier and confirm that the site has your content.
Setting up Custom Domain (Optional)
If you want to have a custom domain, you’ll need to set up your DNS to point to your GitHub Pages and then tell your GitHub Pages repository about your custom domain. By doing it in this order, GitHub will be able to verify that your DNS settings are pointing to the GitHub Pages site.
Set Up DNS A Records
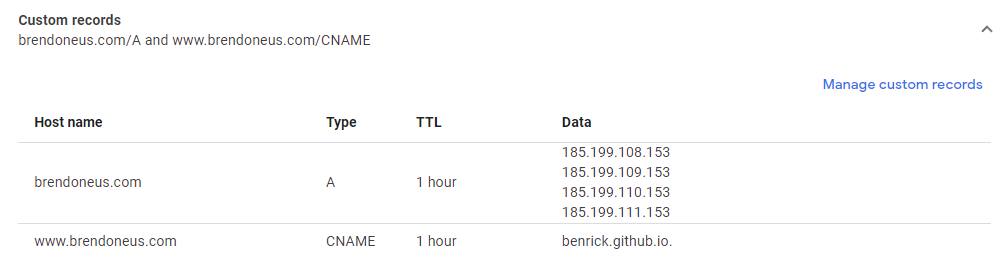
TO set up the A Records for your domain, create it with these IP Addresses pointing at GitHub Pages, so it looks like these:
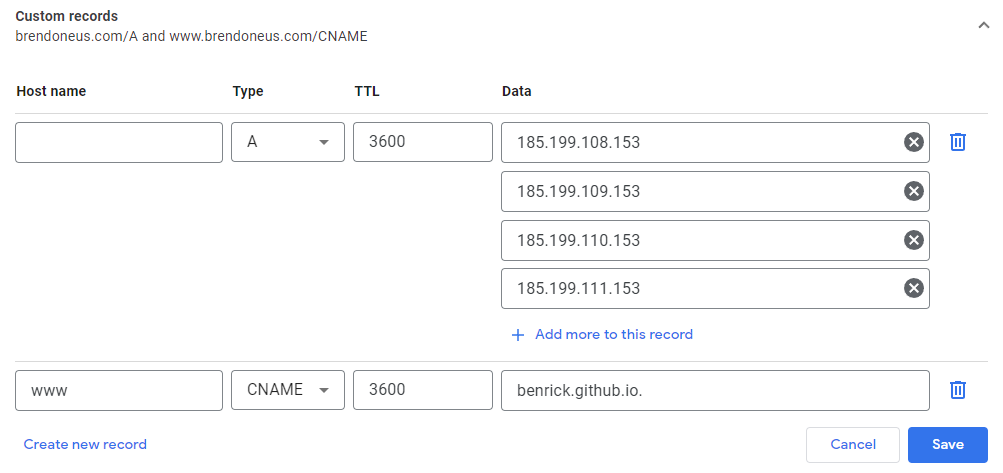
For the first record, leave the Host name blank, set the Type to “A”, and the Data to the first IP Address. In some DNS systems you add more records (like this one), but in other systems, you create 4 separate A records with these addresses.
Next, you’ll set up a CNAME Record to point to the subdomain you have at GitHub, mine is benrick.github.io. Create the CNAME record like this:
Just be sure that you set the Host name to “www”, the Type to “CNAME” and the Data to your “*github.io” subdomain.
Set Custom Domain in GitHub
After configuring DNS, we need to tell GitHub by going to the Settings tab in your repository, and clicking on the “GitHub Pages” link in the sidebar navigation.
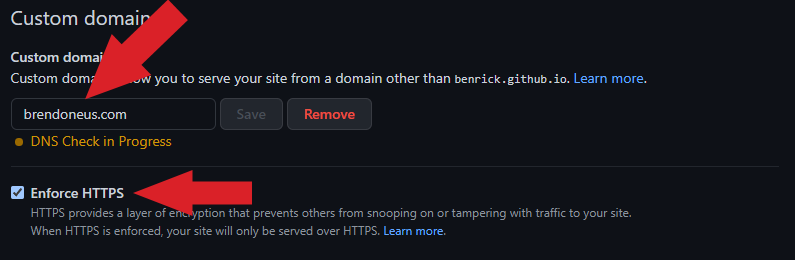
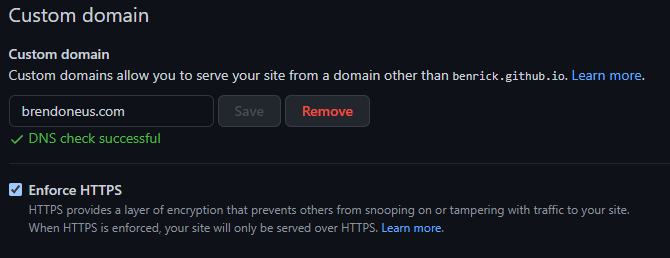
Now change the Custom domain to your domain name that we just configured and save that change, which causes GitHub to run a check of the DNS settings.
Did you know, you can customize the sidebar’s position and contents in VS Code, create files immediately without deciding their location fro the home screen, and go to definition in almost anything in VS Code?
I’ve been creating a series of videos on YouTube about cool things in VS Code that you may not know about. Check out the DevChatter YouTube Channel if you want to see all of my videos, or you can see the VS Code Tips Playlist.
Customizing the VS Code Sidebar
Not only can you decide whether you want the VS Code Sidebar on the left or the right, you can decide what to include in the sidebar.
Moving the Sidebar to the Right or Left in VS Code
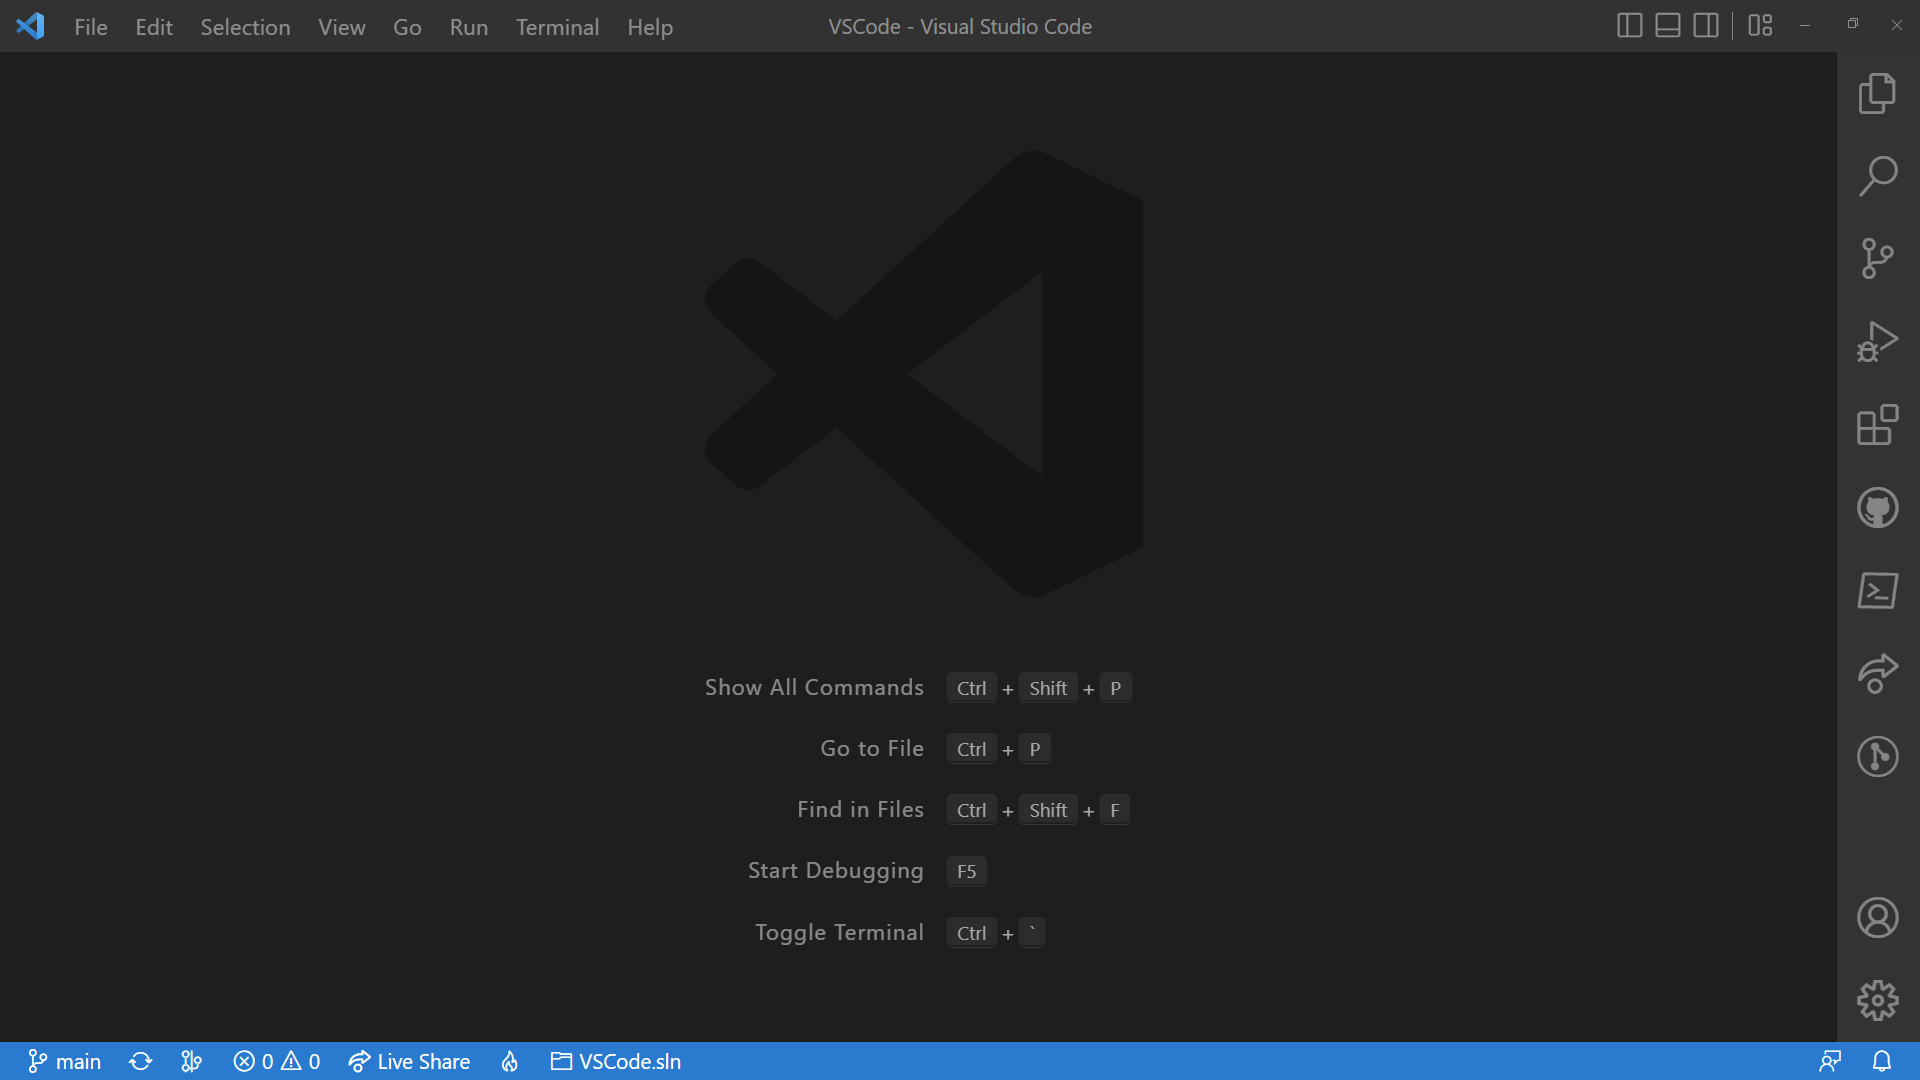
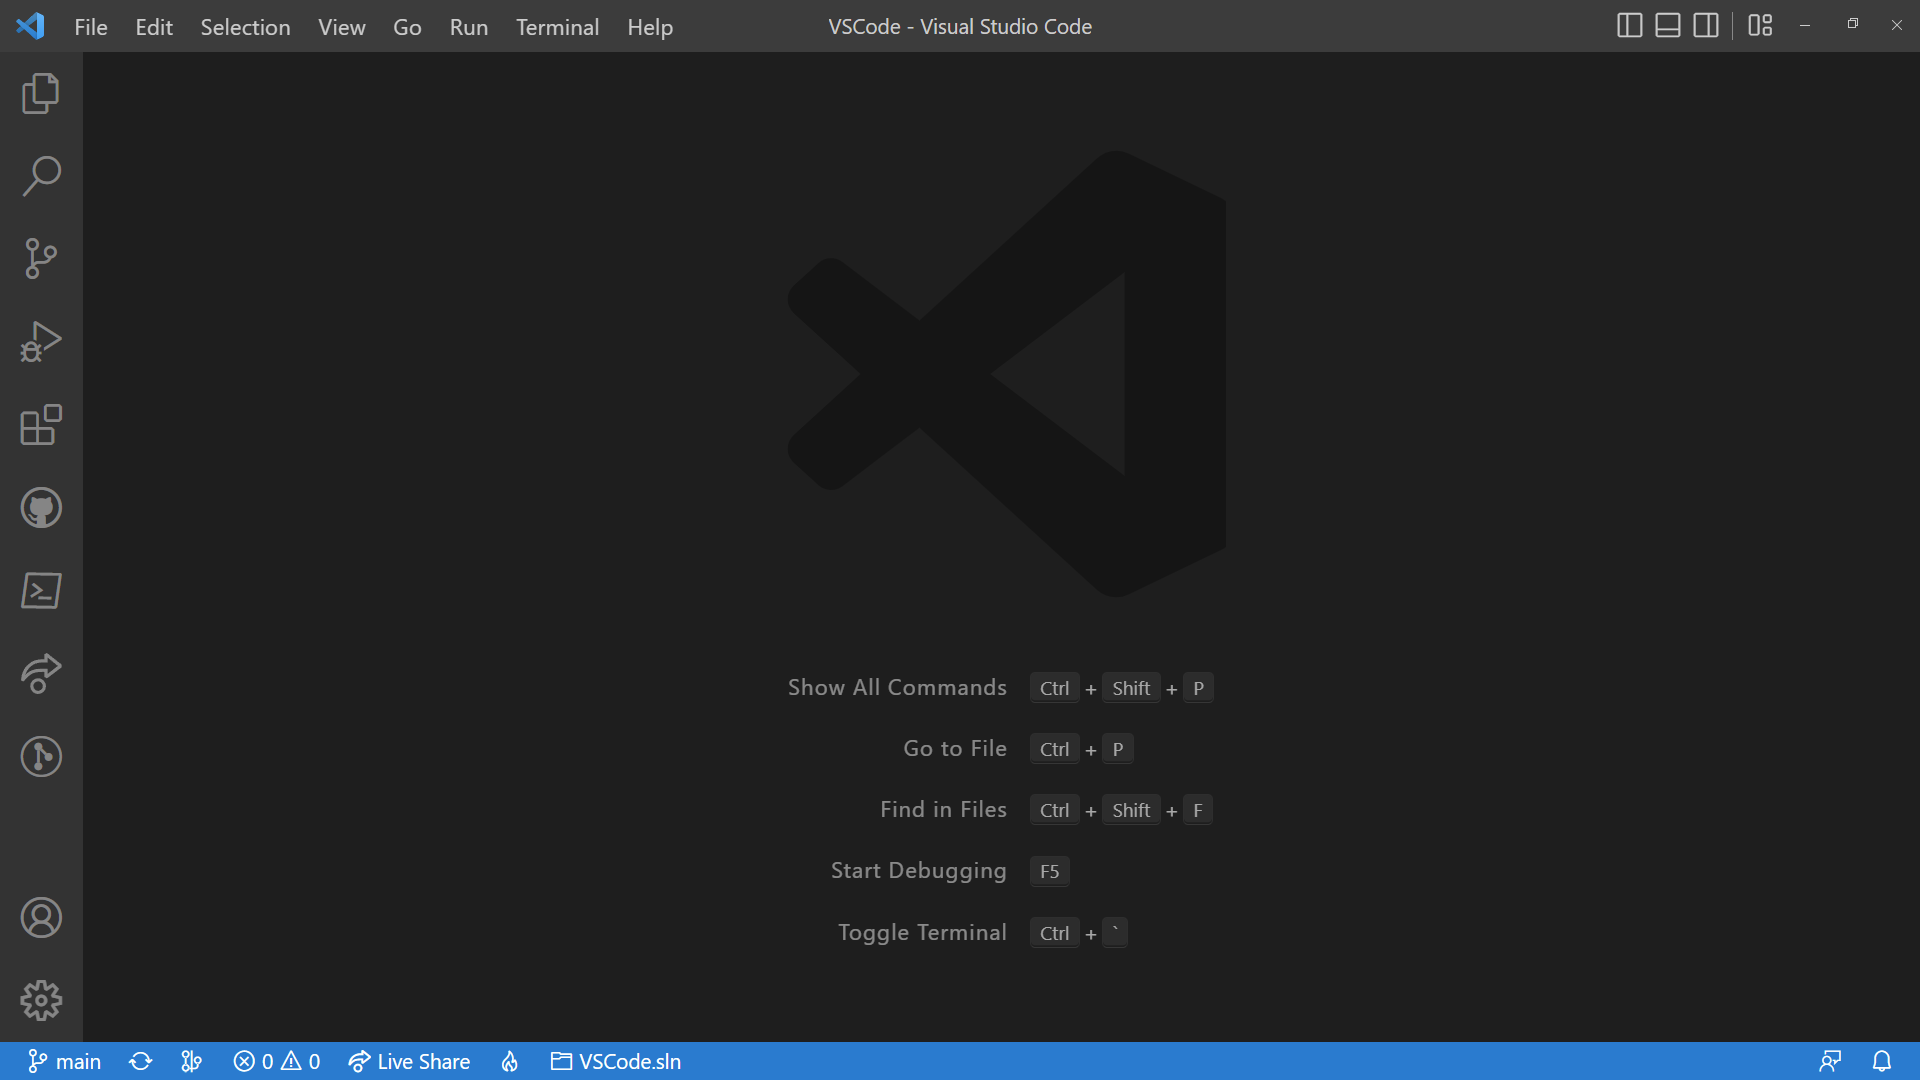
To move the sidebar to the left or the right, simply right click on the sidebar to open this context menu.
Once you’ve made the change, either of these are possible:
VS Code Sidebar on the Right
VS Code Sidebar on the Left
Removing Items from VS Code Sidebar
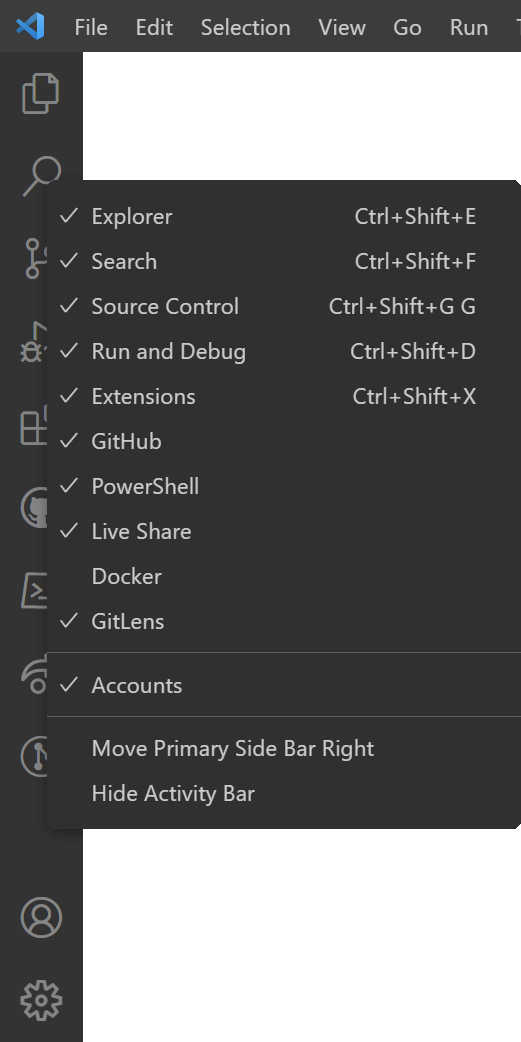
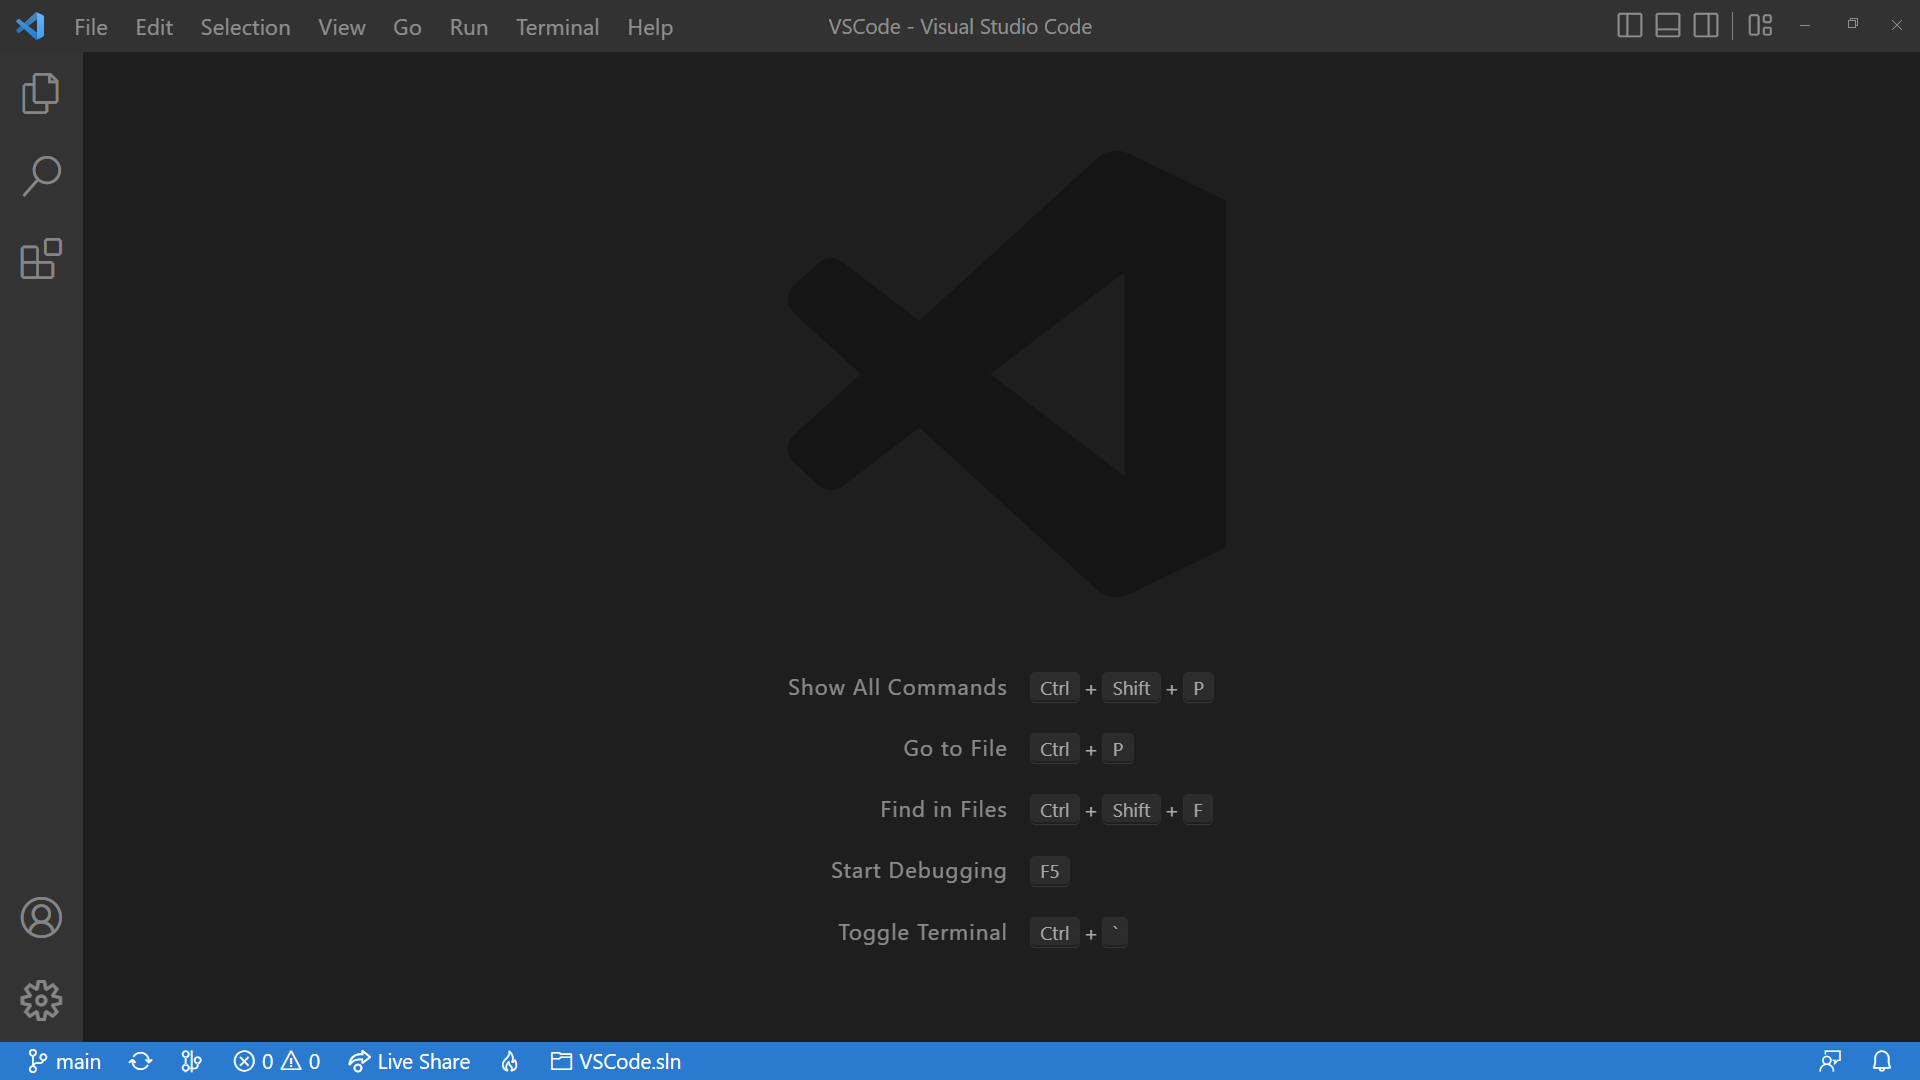
Each of the items in the sidebar of VS Code can also be hidden, so you don’t have a cluttered sidebar where you can’t find the section you’re looking for. To remove the items, right-click on the sidebar to open the same context menu we used to move the sidebar from side to side.
From this context menu, you can click on each item to show or hide it from the list. All with a checkmark are shown on the sidebar. Here’s a nice, clean sidebar.
Create Files with Double Click in VS Code
When you have no files open in VS Code, you can double click on the empty background to immediately open a new editor. At any point, you can save the text in the editor to a file.
This is a quick, easy way to get an editor open to type something, even just to hold onto for a minute.
Go to Definition with Ctrl-Click in VS Code
In VS Code, you can go to definition in many different contexts by holding the Ctrl key and left-clicking on things in the editor.
Clicking on a type name takes you to the type definition.
Clicking on a type members like methods, properties, or fields takes you the their definition on the type.
Clicking on a variable takes you to the declaration of that variable.
Did you know, you can create types from sample JSON VS Code, search for files based on the first letter of each word, and view the whitespace in VS Code?
I’ve been creating a series of videos on YouTube about cool things in VS Code that you may not know about. Check out the DevChatter YouTube Channel if you want to see all of my videos, or you can see the VS Code Tips Playlist.
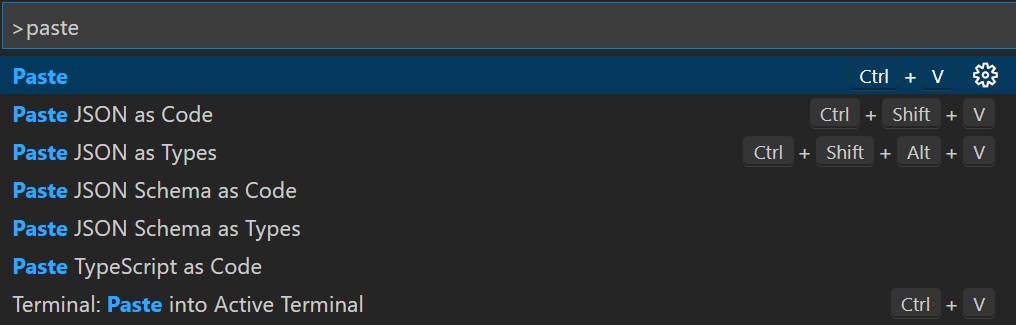
Copy the JSON you want code of onto your clipboard, and open the file where you want to paste the types. Then press F1 or Ctrl + Shift + P to open the commands menu, and search for “paste” to find the commands for Paste JSON as....
If it can’t infer the language from the file extension you’re pasting into, it will ask you to choose a language. If it did know, it will skip this question.
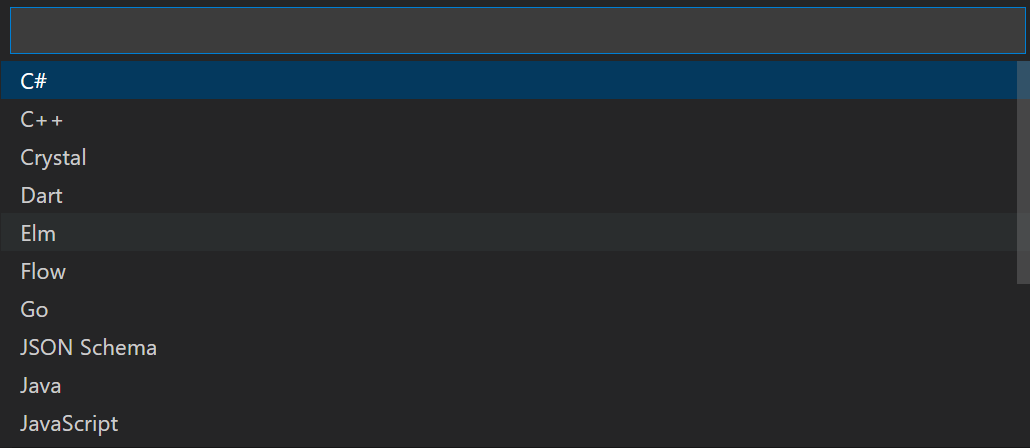
JSON always has a root object (the outer curly braces), but that object doesn’t have a name, so the extension will now ask you to name that root object.
After clicking enter, there will be one or more types created in your file, depending on the complexity of the JSON you were using. It will try to detect types and includes metadate. You can change this data as you like. The command was just to help get you started.
Search for Files By Word in VS Code
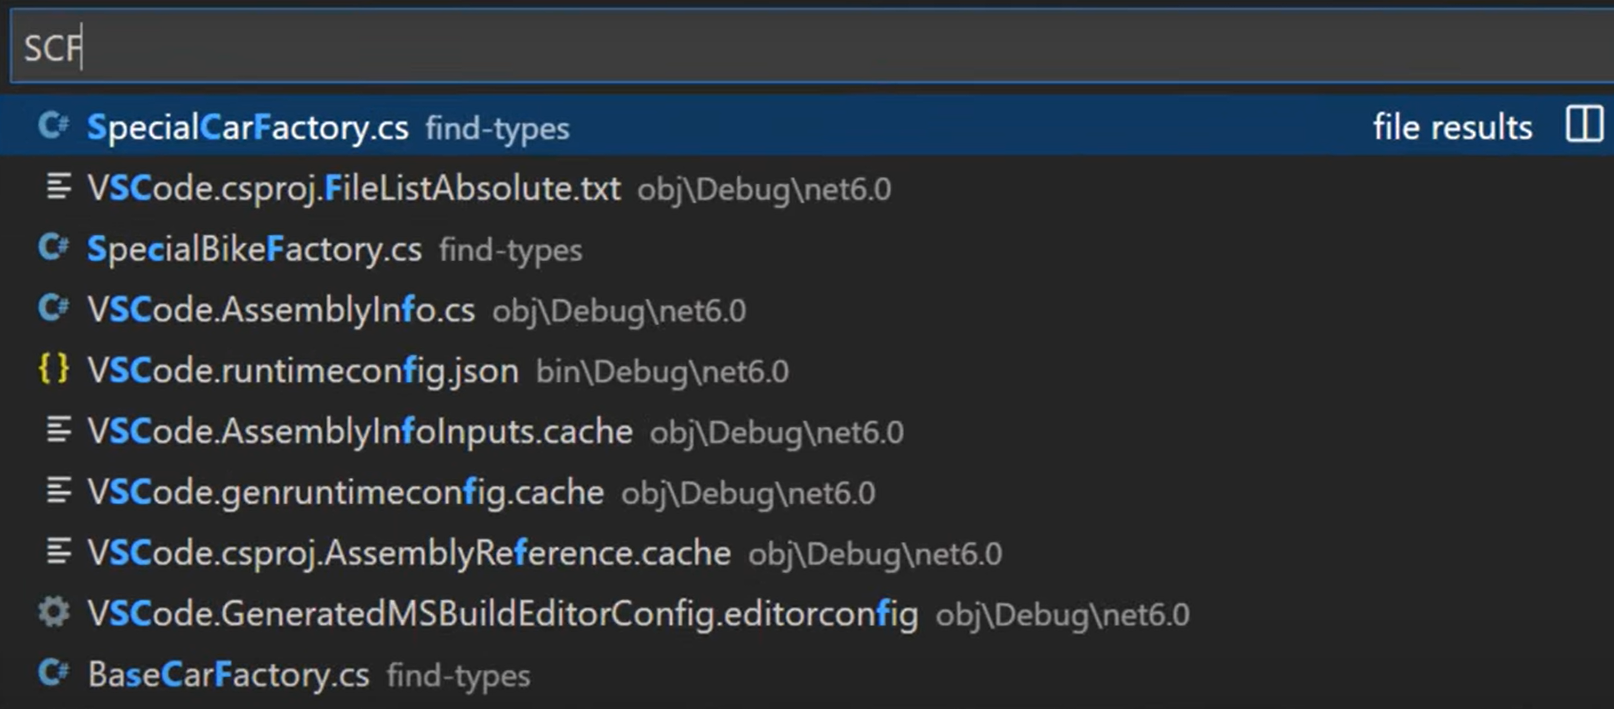
When you’re looking for a file using the search in VS Code, you can search based on the first letters of the words in the name of the file.
To see this in action, open up the file search using Ctrl P. Then type in upper case letters, only the first letter of each word, so if you wanted to find SpecialBikeFactory.cs, you might type “SBF” into the search box.
In addition, you can continue searching more of the word after each of those capitals, so “SpBiFa” would be a great search term if your codebase is large and has more than one type for “SBF”.
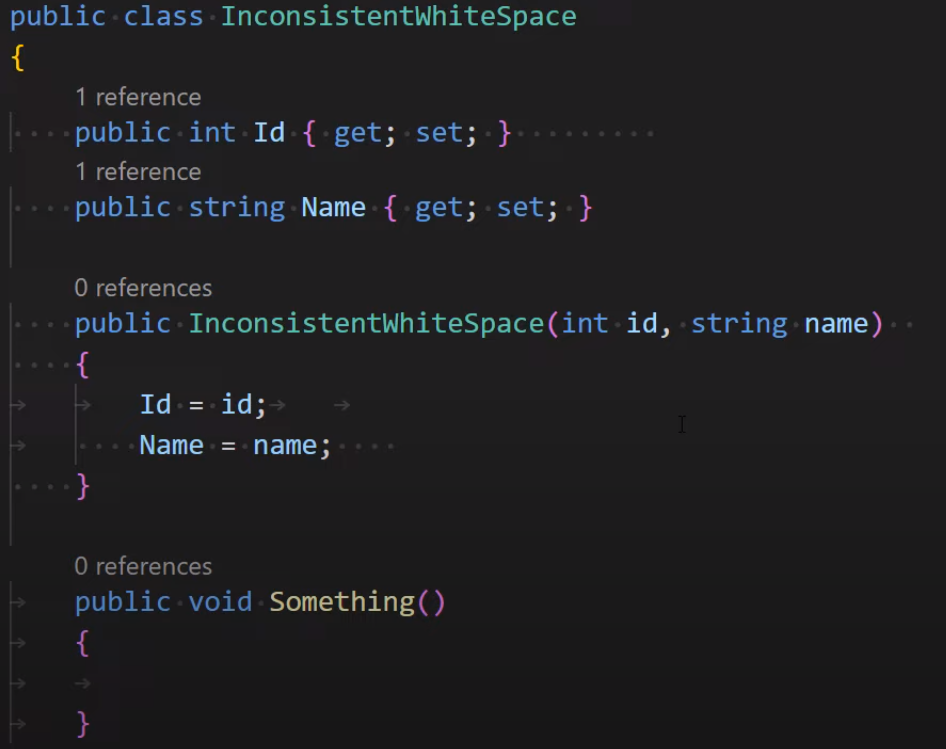
Make Whitespace Visible in VS Code
In some languages, like Python, whitespace matters. In languages where whitespace matters less, it’s still important for formatting. In Visual Studio Code, you can make the whitespace visible. To do this, go to the View menu and select Render Whitespace. Doing this will show spaces as dots and tabs as arrows.
Even years after the changes, many people are confused by all of the different “dot nets” that have existed and still exist. Read on to find out what’s going on and we’ll remove that confusion around .NET Framework, .NET Core, .NET.
If you'd rather watch a video on this topic, you can check out my [What's the Difference between .NET Framework and .NET Core?](https://youtu.be/dLRd_LjVjNs) video on YouTube (or watch here).
Abbreviated History of .NET
Let’s understand the confusion by looking quickly at the history of our .NETs.
Brief Early .NET History
The first of these “.NETs” we got was the .NET Framework, which was a framework for building Windows applications. It’s been around for decades and still runs many applications to this day.
We had some variations of this that we won’t cover for now, but Microsoft eventually created an alternate option called .NET Core. Core removed the dependence on Windows, which allowed it to be cross-platform. It was neither a subset nor a superset of the existing .NET Framework, since they did take the chance to change some things as they removed some of the old baggage.
The Time of Parallel .NETs
After .NET Core came around, most of the people with connections to the developer division at Microsoft likely told you that .NET Core was the future, despite the many reassuring statements from Microsoft about fully supporting and maintaining the .NET Framework for years.
All of my new projects (that could be) were created on .NET Core, and I insisted to all of my clients that they follow the same policy. I’m glad we did, because .NET was/is the future of .NET (more on that below).
At this point, we had 2 separate .NET implementations, one that had a lot of legacy and was windows-focused and another without that legacy and was cross-platform. This alone had some confusion, since people didn’t know which to use for new projects. Some people thought that Framework was if you were on Windows only and Core was for non-Windows or both. That was wrong, but understandable how that mistake was made.
Many companies were not switching to .NET Core, because they thought it was an “alternate path”, not the future of .NET.
The Union of the .NETs
I wasn’t in the backroom at Microsoft when they decided this, but I’m sure they were trying to figure out how to get everyone to switch to .NET Core and leave .NET Framework as a relic. Many companies were reluctant to put in the effort, so they decided to “merge” the two together into “.NET”.
Since .NET Core’s and .NET Framework’s major version numbers were on 3 and 4 respectively, they decided to start the “merged” .NET at 5 (an increased number regardless of your starting point).
Awesome! So you might be wondering, what is this new .NET that isn’t Core or Framework, well, it is .NET Core, but they dropped “Core” from the name to make it clear that it’s the future and not an alternative. In doing this, they’ve removed the “is this the new path or an alternate path?” question.
The Takeaway
At this point, we’re in the same place we have been for a while. Your answer for, “which should I choose” is .NET latest version, not “Core” or “Framework” anymore.
If you require Core or Framework for some reason (highly unlikely that you do), you can create those, but the future is the .NET for any project you may start.
If you’re building a Windows application, you can build WinForms, WPF, UWP, MAUI, etc. using .NET, so there’s very little reason to pick Framework for those.
Intentionally Not Covered Topics
You may have noticed that I didn’t talk about any of the other .NETs that exist. I may explain those in future posts and/or videos, but I wanted to clear up this confusion without adding those extra bits that might make it harder to come across.
Stop asking to send me notifications! I don’t want them! I also don’t want to tell your site my location.
Are you tired of being asked if sites can send you notifications or get your location? Yeah, me too. Let’s fix that.
How to Stop Sites In Chrome Asking to Send Notifications or Location
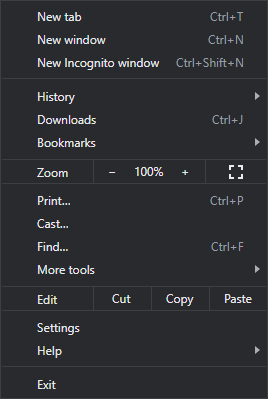
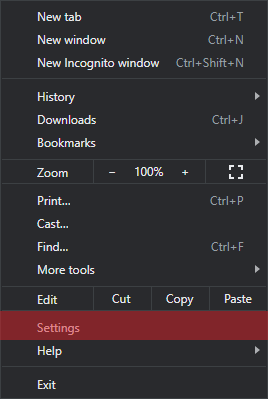
Open up Chrome, and look for the 3 dots in the upper right corner of the window. That will open up the options menu that looks like this.
From that menu, click on Settings seen here:
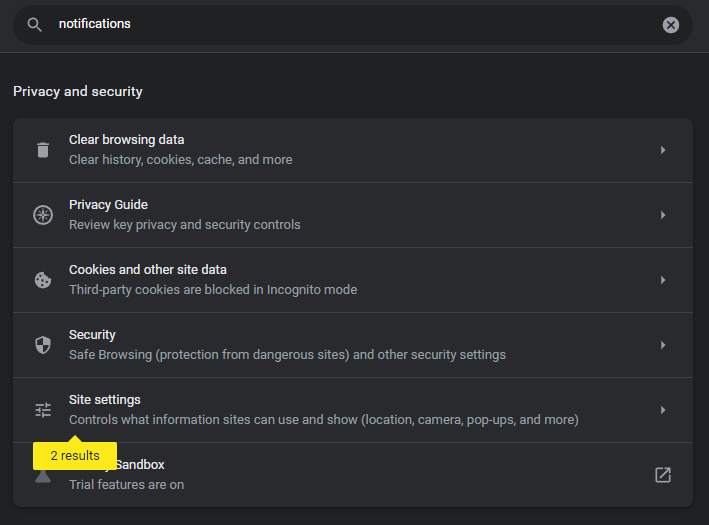
Once on the settings screen, you’ll see a search bar like this. Click into it.
Type the word “notifications” into the search to yield results like this.
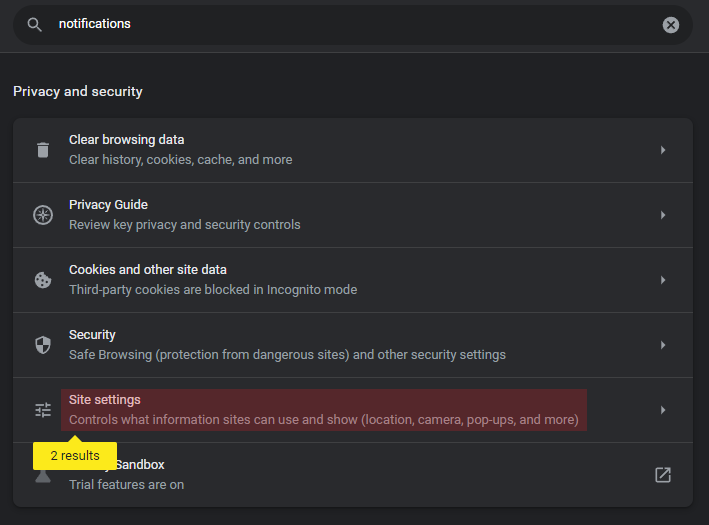
From here, you’ll want to open up the Site Settings section of the results, highlighted here. Notice that the search is also indicating that it found results in there.
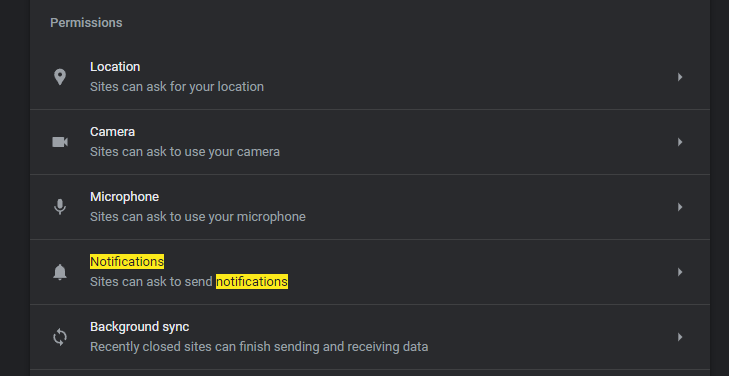
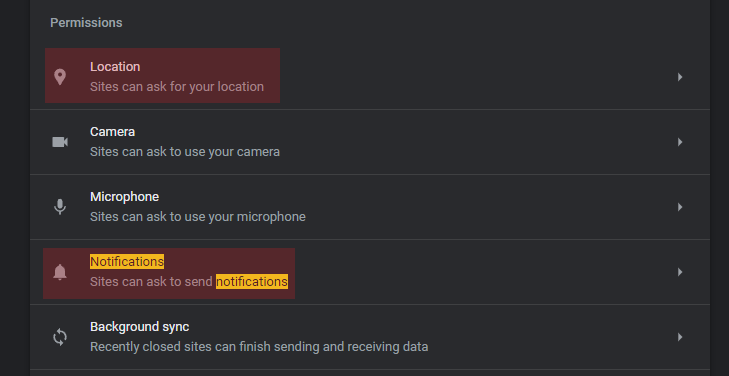
In the Site Settings screen, you’ll find a section called Permissions, which is where we’ll be making our changes.
Two sections in Permissions matter to us, the Location and Notification sections. Open up the Notifications first.
Disabling Chrome Notification Request Permissions
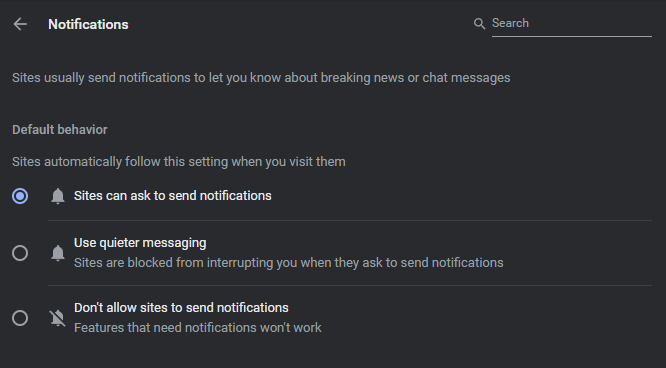
On the Notifications Permissions screen, you’ll likely find these settings (the default).
To remove the permissions from all sites asking to send notifications, select the Don't allow sites to send notifications option, which will prevent sites from even asking to send notifications.
Now click the back button to also remove Location Request permissions.
Disabling Chrome Location Request Permissions
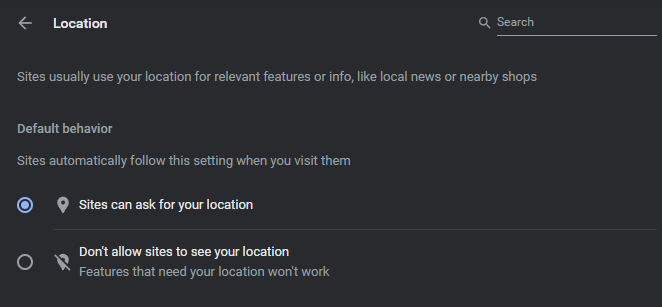
Open up the Location Permissions screen, and you’ll likely find these settings (the default).
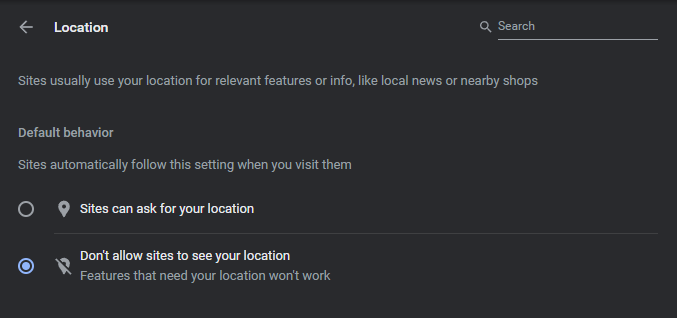
To remove the permissions from all sites asking to request your location, select the Don't allow sites to see your location option, which will prevent sites from even asking to know your location.
Keep in mind that some sites will not work if knowing your location is required for the site to work. If this happens, you can come back to site settings and configure the permissions for that site, giving it location permissions.
How to Stop Sites in Firefox Asking to Send Notifications or Location
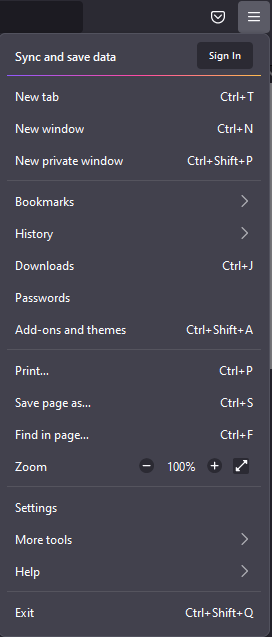
Open up Firefox, and look for the 3 lines (hamburger menu) in the upper right corner of the window. That will open up the options menu that looks like this.
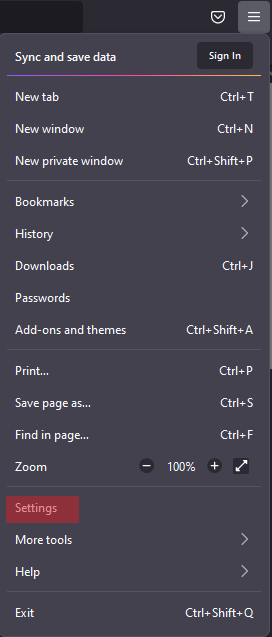
From that menu, click on Settings as seen here.
Once on the settings screen, you’ll see a search bar like this. Click into it.
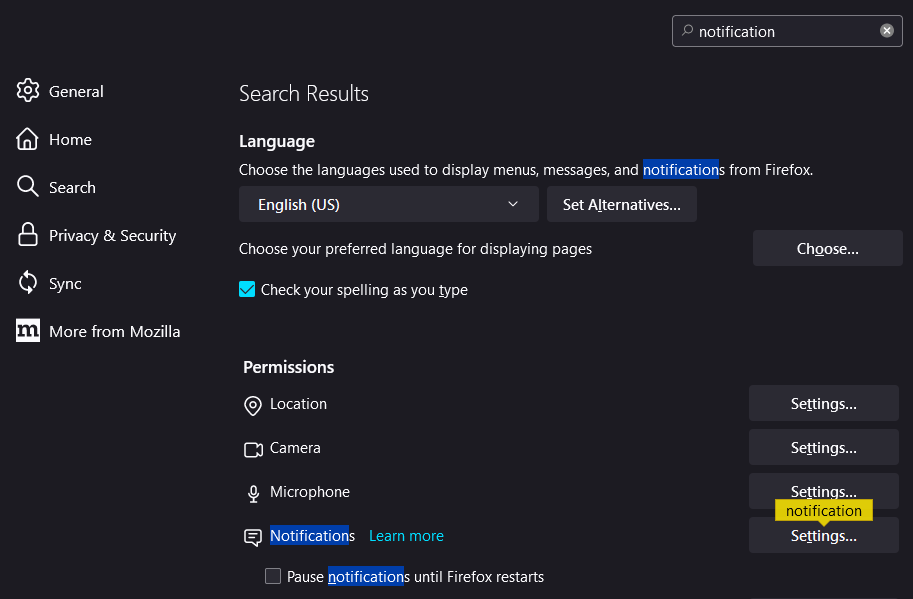
Type the word “notifications” into the search to yield results like this.
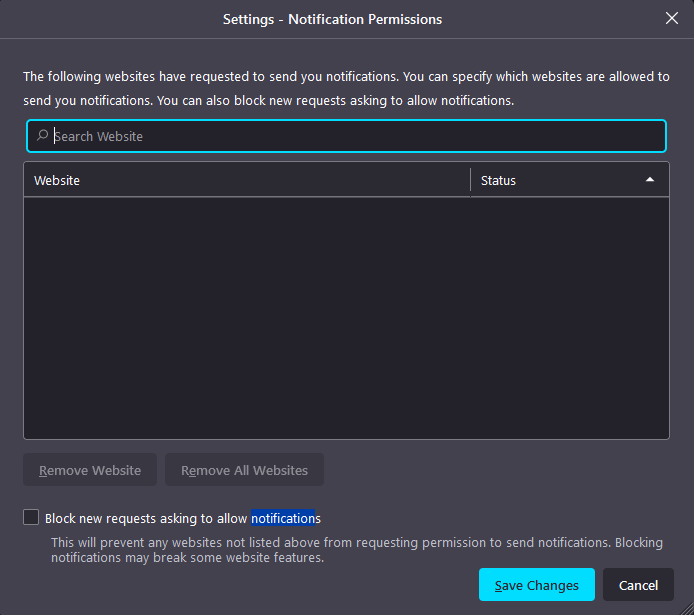
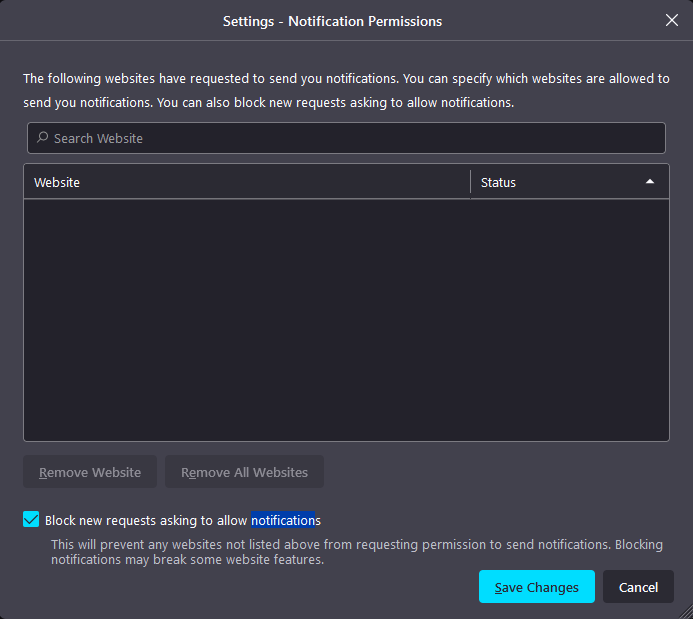
The Settings... button that has the notification note above it is the one we want to open, which will bring us to this screen with the checkbox we want.
To disable these requests from all sites, check the Block new requests asking to allow notifications checkbox and click save.
Disabling Firefox Location Request Permissions
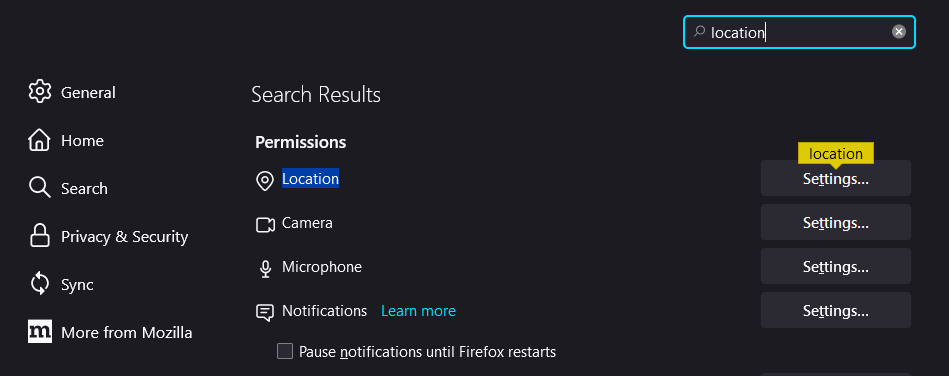
Type the word “location” into the search to yield results like this.
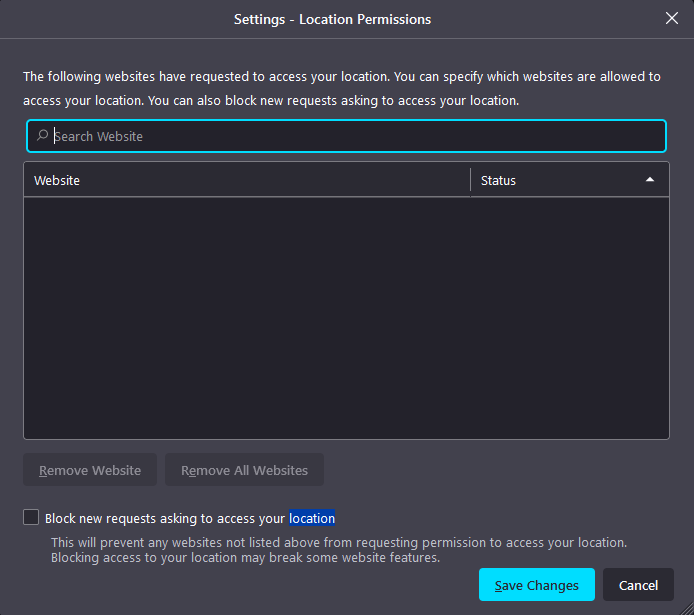
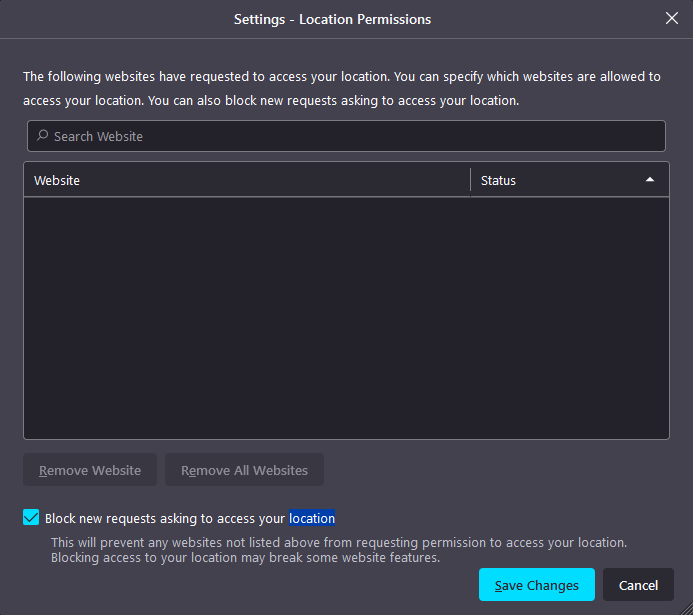
The Settings... button that has the location note above it is the one we want to open, which will bring us to this screen with the checkbox we want.
To disable these requests from all sites, check the Block new requests asking to access your location checkbox and click save.
Keep in mind that some sites will not work if knowing your location is required for the site to work. If this happens, you can come back to site settings and configure the permissions for that site, giving it location permissions.
How to Stop Sites in Edge Asking to Send Notifications or Location
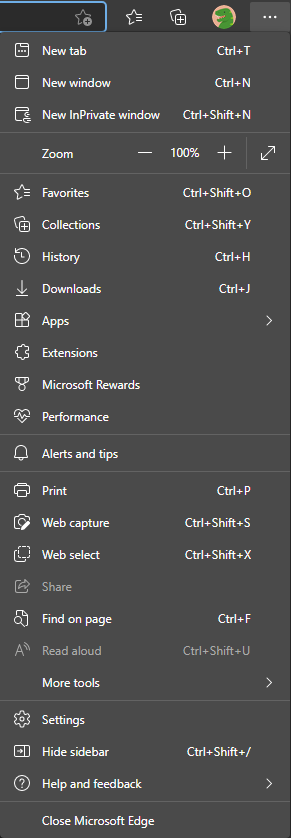
Open up Edge, and look for the 3 dots in the upper right corner of the window. That will open up the options menu that looks like this.
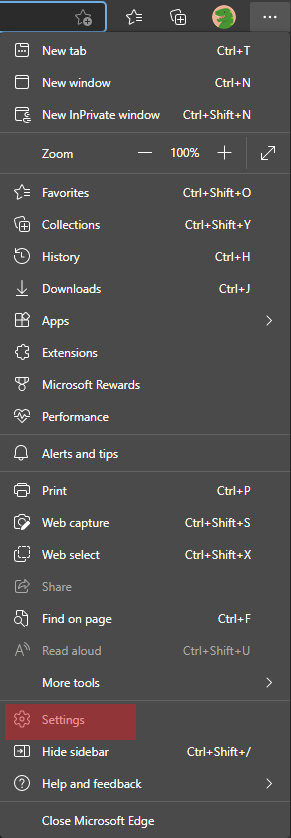
From that menu, click on Settings as seen here.
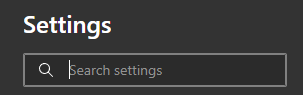
Once on the settings screen, you’ll see a search bar like this. Click into it.
Disabling Edge Notification Request Permissions
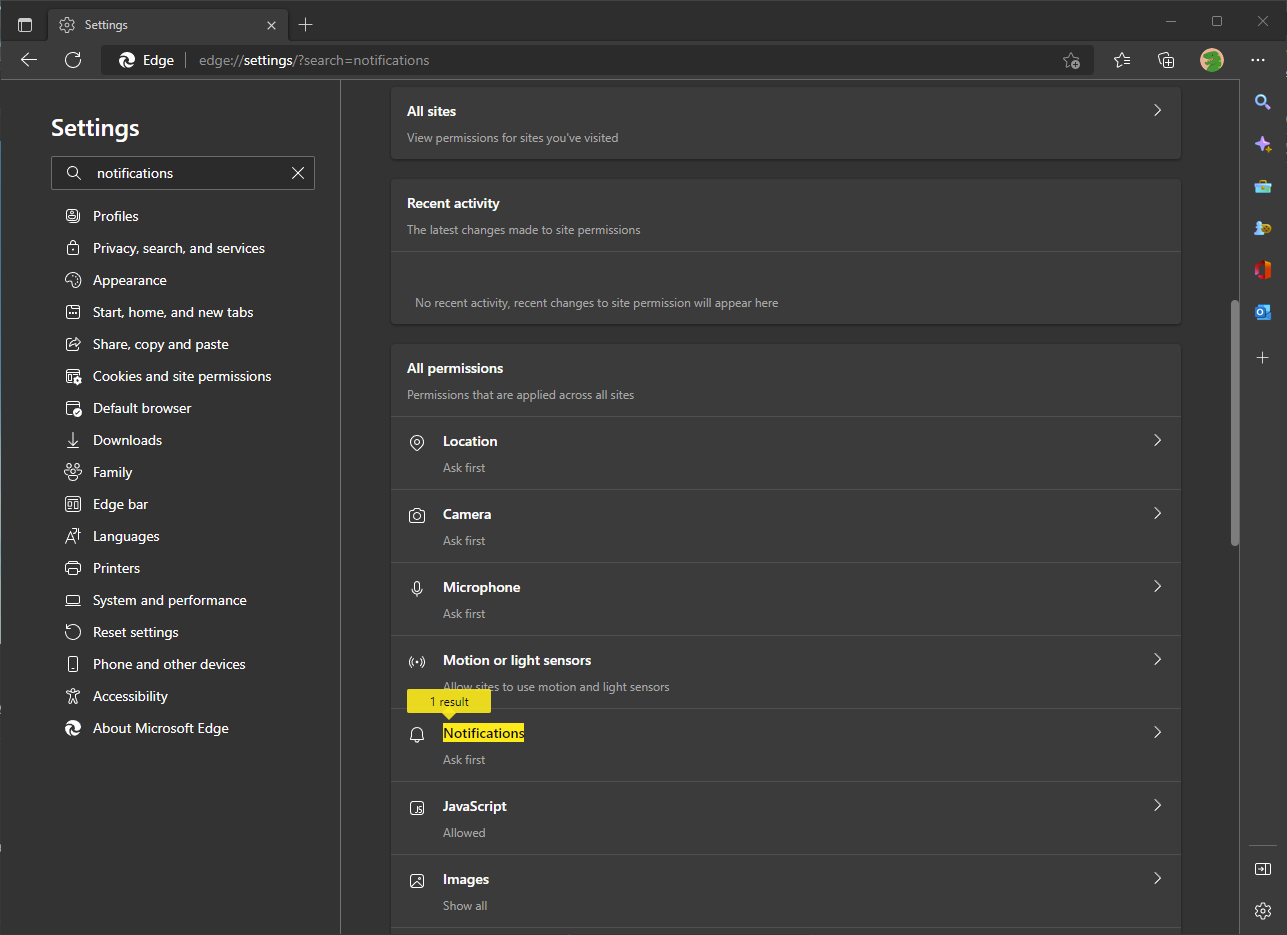
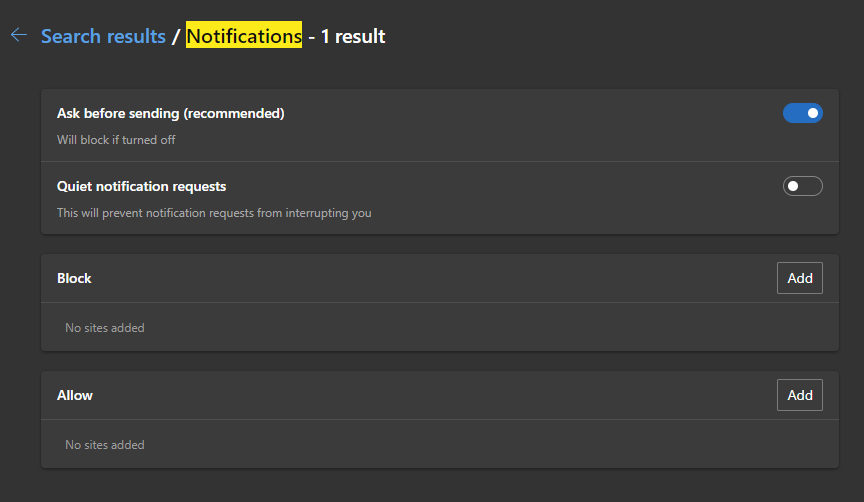
Type the word “notifications” into the search to yield results like this (scrolled down to this point).
The Notifications button in All permission is the one we want to open (it’s marked by the search result indicator). Clicking it will bring us to this screen with the toggle we want.
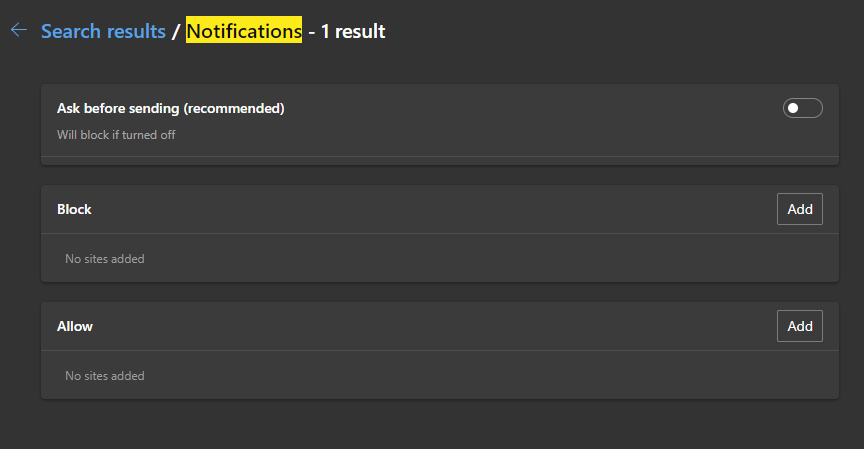
To disable these requests from all sites, toggle the Ask before sending (recommended) option off like this.
Disabling Edge Location Request Permissions
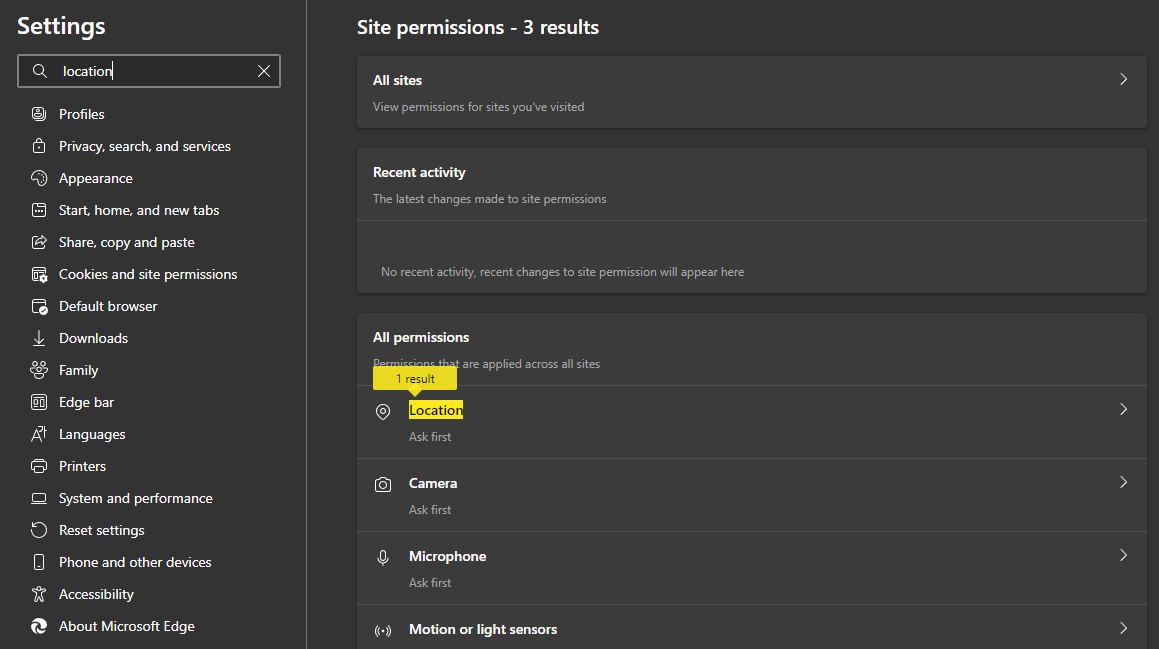
Type the word “location” into the search to yield results like this.
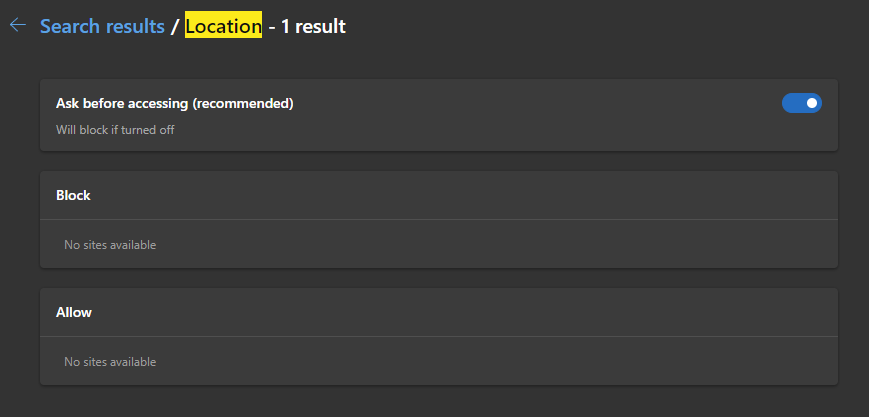
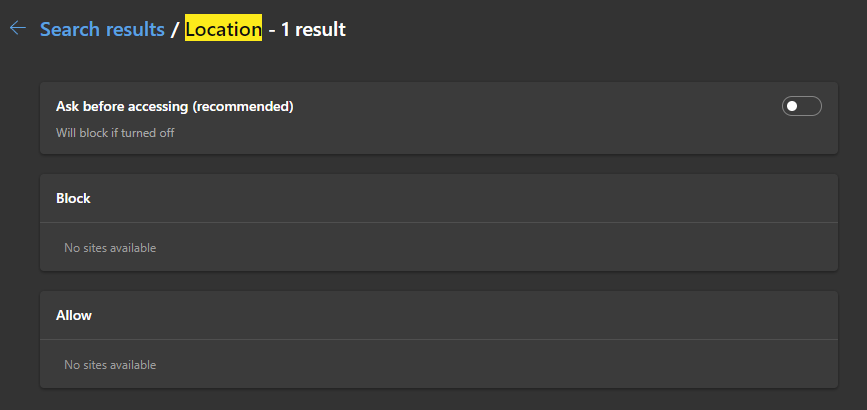
The Location button in All permissions is the one we want to open (it’s marked by the search result indicator). Clicking it will bring us to this screen with the toggle we want.
To disable these requests from all sites, toggle the Ask before accessing (recommended) option off like this.
Keep in mind that some sites will not work if knowing your location is required for the site to work. If this happens, you can come back to site settings and configure the permissions for that site, giving it location permissions.


