I recently moved my blog (this one) from BlogEngine.NET to a Jekyll site on GitHub Pages. I tried to keep all of my posts working with the same URLs for the content. I didn’t worry about the tags, categories, etc. pages remaining the same. I figured that no one linked to those anyway, so the redirects would only be important on the posts.
Hopefully this post will help you migrate an old site from any platform (not just BlogEngine.NET) to Jekyll on GitHub Pages.
Exporting Existing Blog Content
Before we can create all of the posts on the new site, we’ll need to export the posts from our existing site. For this, most sites have an export function. In BlogEngine.NET, you’ll want to got to the Admin Dashboard by navigating to /admin/ or clicking on Dashboard in the Admin widget.
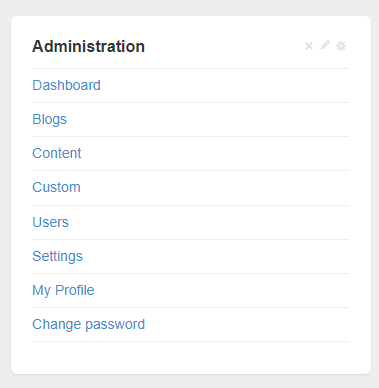
From here, we need to open up Settings -> Import export then click on the Export button in the Export section of that page.

When we click this button, the site will create a BlogML.xml and your browser will download it. That’s an XML containing your posts, comments, metadata, etc. from your site.
Setting Up Jekyll Site on GitHub Pages
Now I needed a new GitHub repository to host the content for my site, so I created benrick.github.io to host my site.
Types of GitHub Pages sites
For GitHub Pages, you can set up User, Organization, or Project sites to be hosted by GitHub Pages.
I did a user site with repository name benrick.github.io, which followed the required repository name pattern of [username].github.io (will be the same as the address).
If I’d done a site for my DevChatter organization, it would’ve been devchatter.github.io, following the [organization].github.io pattern.
If I did a project site, it could’ve had any name, but would be hosted at [username].github.io/[project-name] or [organization].github.io/[project-name]. So if you’re going to do this, be warned of the subfolder, which can be avoided with a custom domain (discussed below).
Configuring the Repository as a GitHub Pages Site
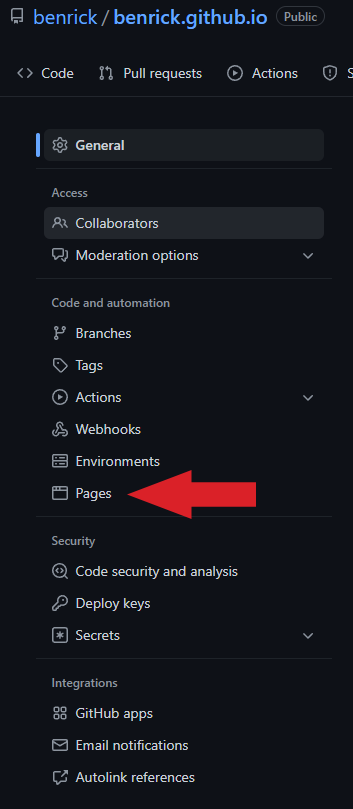
Navigate to the Settings of the repository and click on the Pages menu item in the Code and automation section of the sidebar navigation.
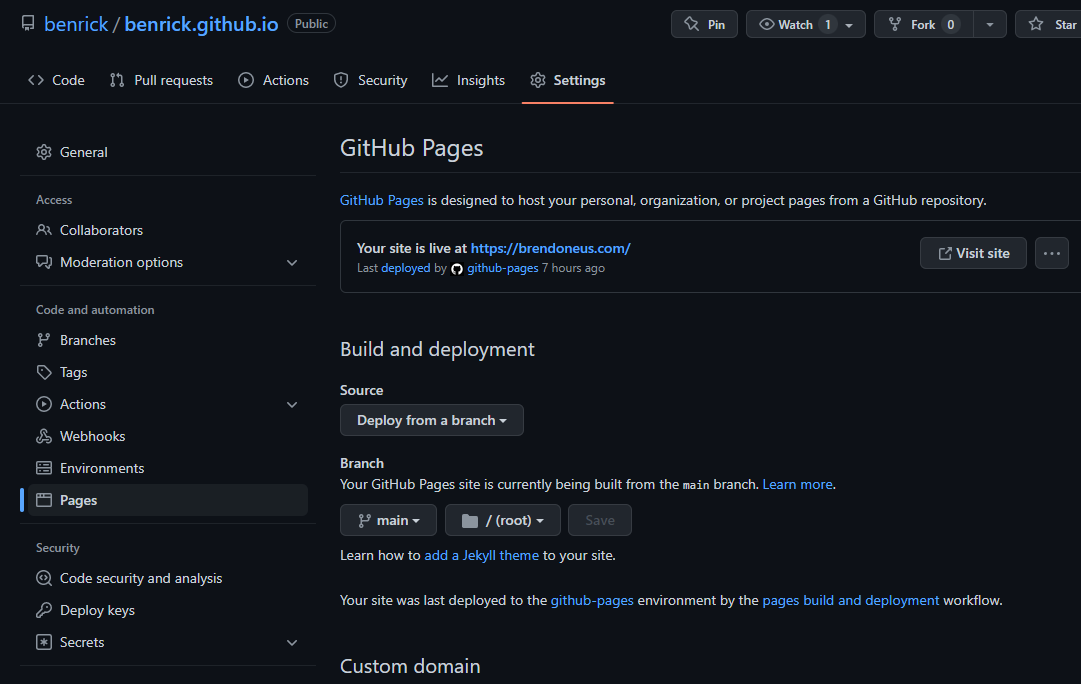
- Source should be set to
Deploy from a branchfor our simple case. - I set Branch to
mainand I keep the site in the root, so folder of/(root). - Don’t fiddle with the Custom domain yet, we’ll come back to that later.
Now that it’s configured, make sure that everything is working. Create an index.md file in the root of your GitHub repository with anything you like. Here’s an example:
<p>Hello World!</p>Next, we’ll make our _config.yml file in the root of your GitHub repository with these initial values:
title: Your Site
description: A site you built on GitHub Pages!
theme: jekyll-theme-minimal
If you created these files directly on GitHub, you can just wait, but if you created these locally, push them to GitHub. Now you’ll want to wait a few minutes for it to deploy, and try to visit your site at the *.github.io address that you chose earlier. If all is set up, you’ll see your
Official GitHub Page Get Started Documentation
Choosing and Customizing a Theme
Selecting a theme can offer a lot of benefits. Setting it up to work locally will require setting up ruby, installing the gems for the theme and its dependencies, etc.
If you’re just planning to deploy without running it locally, you can skip those for now (you can add local running later).
Here are a few places to find free themes (there are many more):
- https://pages.github.com/themes/
- https://jekyllthemes.io/free
- https://jekyll-themes.com/free/
And if you want to (and have the money to) support content creators, there are many paid Jekyll themes as well.
Once you’ve chosen a theme, you’ll either be setting the theme: or remote_theme: in the _config.yml file in the root of your site. Most of the themes you find will have their own instructions, which are often for running it locally. Setting these properties will let it work with the GitHub Pages workflow.
Converting Blog Posts to Jekyll Markdown Posts
After exporting your content from your previous blog, check to see if there’s a tool created to convert that export into markdown files. Once completed, you’ll put all of those markdown files (if the tool didn’t do it) into the _posts directory in your repository.
For my conversion from BlogML.xml (the data exported by BlogEngine.NET), I started with this blogml.rb file and made a few tweaks to it. You can start with that one, but it’s written for Octopress, a framework based on jekyll. It’s close enough to Jekyll to get you started. Alternately, you can use my tweaked version of the BlogML.xml to Jekyll import script.
Regardless of the one you’re using, with ruby installed on your computer and the BlogML.xml file and the blogml.rb file in the same folder, run the following command in that folder.
ruby -r './blogml.rb' -e Jekyll::BlogML.process('BlogML.xml')
After running this, you should have a _posts folder full of your posts.
Content Fixes
Be sure to check through your pages, articles, etc. since you’ll want to be sure they transferred correctly. There could be issues in the “frontmatter” (metadata at the top of the file), so be sure to check titles, permalinks, and tags.
Some of these issues can be fixed by hand, but anything that happened in a large number of files will require some clever finding and replacing.
Migrating Files and Images from BlogEngine.NET to Jekyll
In the root of your new site, create two folders named files and images. These are where your files and images will go.
Download the /App_Data/files folder from your old BlogEngine.NET site. Use whatever means you have of accessing your old site’s file system. I used FTP access to it.
You now need to split the files and images into their respective folders, maintaining the original structure.
To make this easier, I recommend that you put a copy of the files into each of the two folders. Then delete the images from the /files folder and the files from the /images folder.
Deploying and Verifying
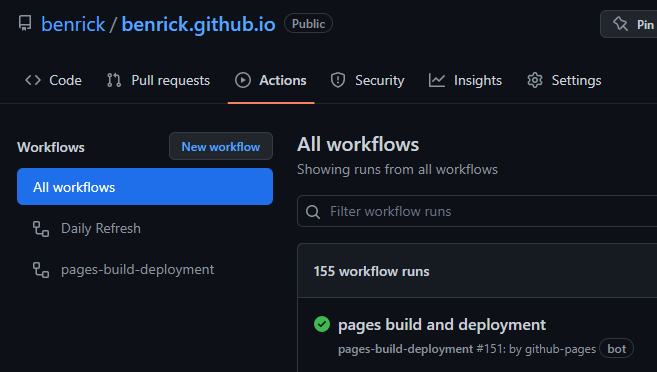
Commit your changes and push them all to the GitHub repository. As we’re using GitHub Pages default deployment, you should be able to navigate to the Actions section on the repository before it completes the deployment to see that it is building and deploying the static site.
Nav to GitHub Actions in Repository
You should see deployments from our previous changes to the repository.
After confirming that it has a deployment (it should be green), you’ll want to navigate to your *.github.io site as we did earlier and confirm that the site has your content.
Setting up Custom Domain (Optional)
If you want to have a custom domain, you’ll need to set up your DNS to point to your GitHub Pages and then tell your GitHub Pages repository about your custom domain. By doing it in this order, GitHub will be able to verify that your DNS settings are pointing to the GitHub Pages site.
Set Up DNS A Records
TO set up the A Records for your domain, create it with these IP Addresses pointing at GitHub Pages, so it looks like these:
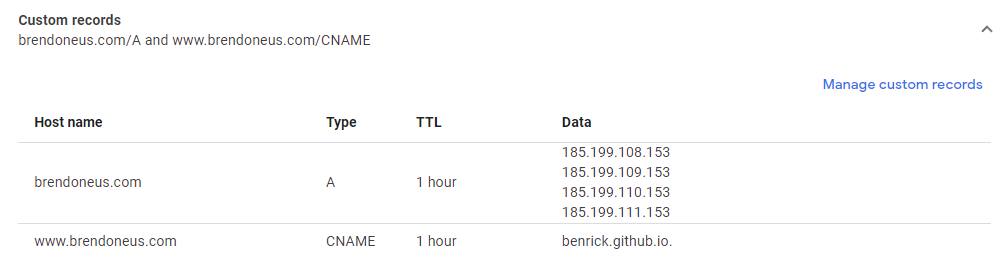
For the first record, leave the Host name blank, set the Type to “A”, and the Data to the first IP Address. In some DNS systems you add more records (like this one), but in other systems, you create 4 separate A records with these addresses.
- 185.199.108.153
- 185.199.109.153
- 185.199.110.153
- 185.199.111.153
You can check the GitHub Pages Custom Domain Docs for the most up-to-date list of IP Addresses.
Set Up DNS CNAME Record
Next, you’ll set up a CNAME Record to point to the subdomain you have at GitHub, mine is benrick.github.io. Create the CNAME record like this:
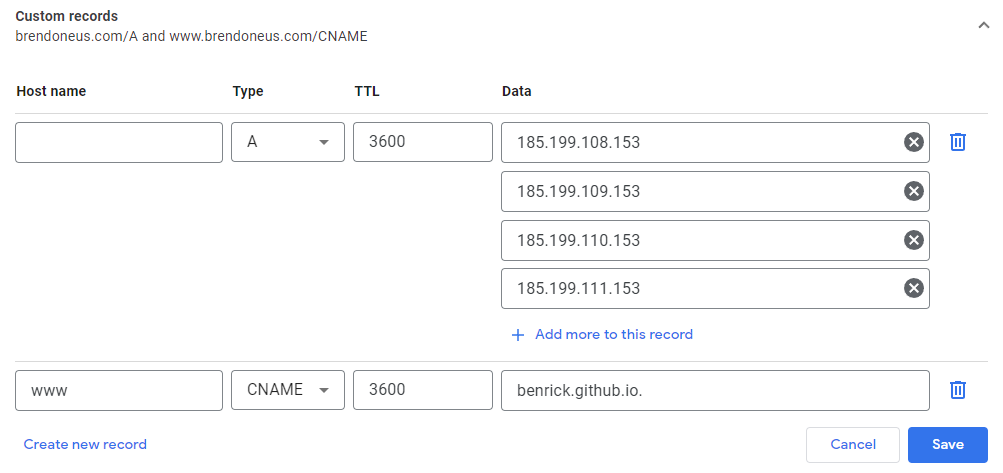
Just be sure that you set the Host name to “www”, the Type to “CNAME” and the Data to your “*github.io” subdomain.
Set Custom Domain in GitHub
After configuring DNS, we need to tell GitHub by going to the Settings tab in your repository, and clicking on the “GitHub Pages” link in the sidebar navigation.
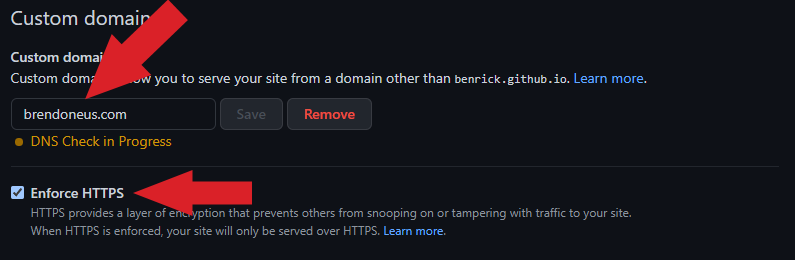
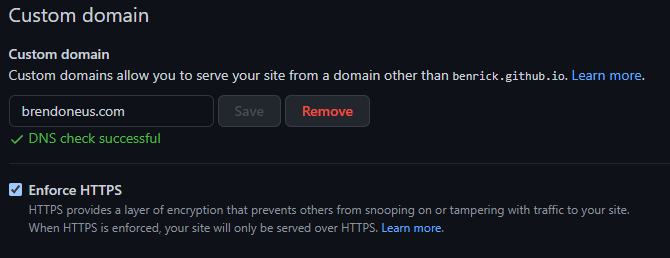
Now change the Custom domain to your domain name that we just configured and save that change, which causes GitHub to run a check of the DNS settings.
After verification, the page will look like this:
Additional Resources
If you want full instructions for setting up the custom domain name for GitHub using Google Domains, check my post about how to set up a custom domain from google domains for GitHub pages.
Comments